Okta SSO
In this article, you'll learn how to integrate with Okta SSO. When you integrate Skills Workflow with Okta, you can:
- Control in Okta who has access to Skills Workflow.
- Enable your users to be automatically signed-in to Skills Workflow with their Okta accounts.
Prerequisites
To get started, you need the following items:
- An Okta subscription.
- Skills Workflow single sign-on (SSO) enabled subscription.
Configure Okta SSO
Follow these steps to enable Okta SSO in the Admin center.
-
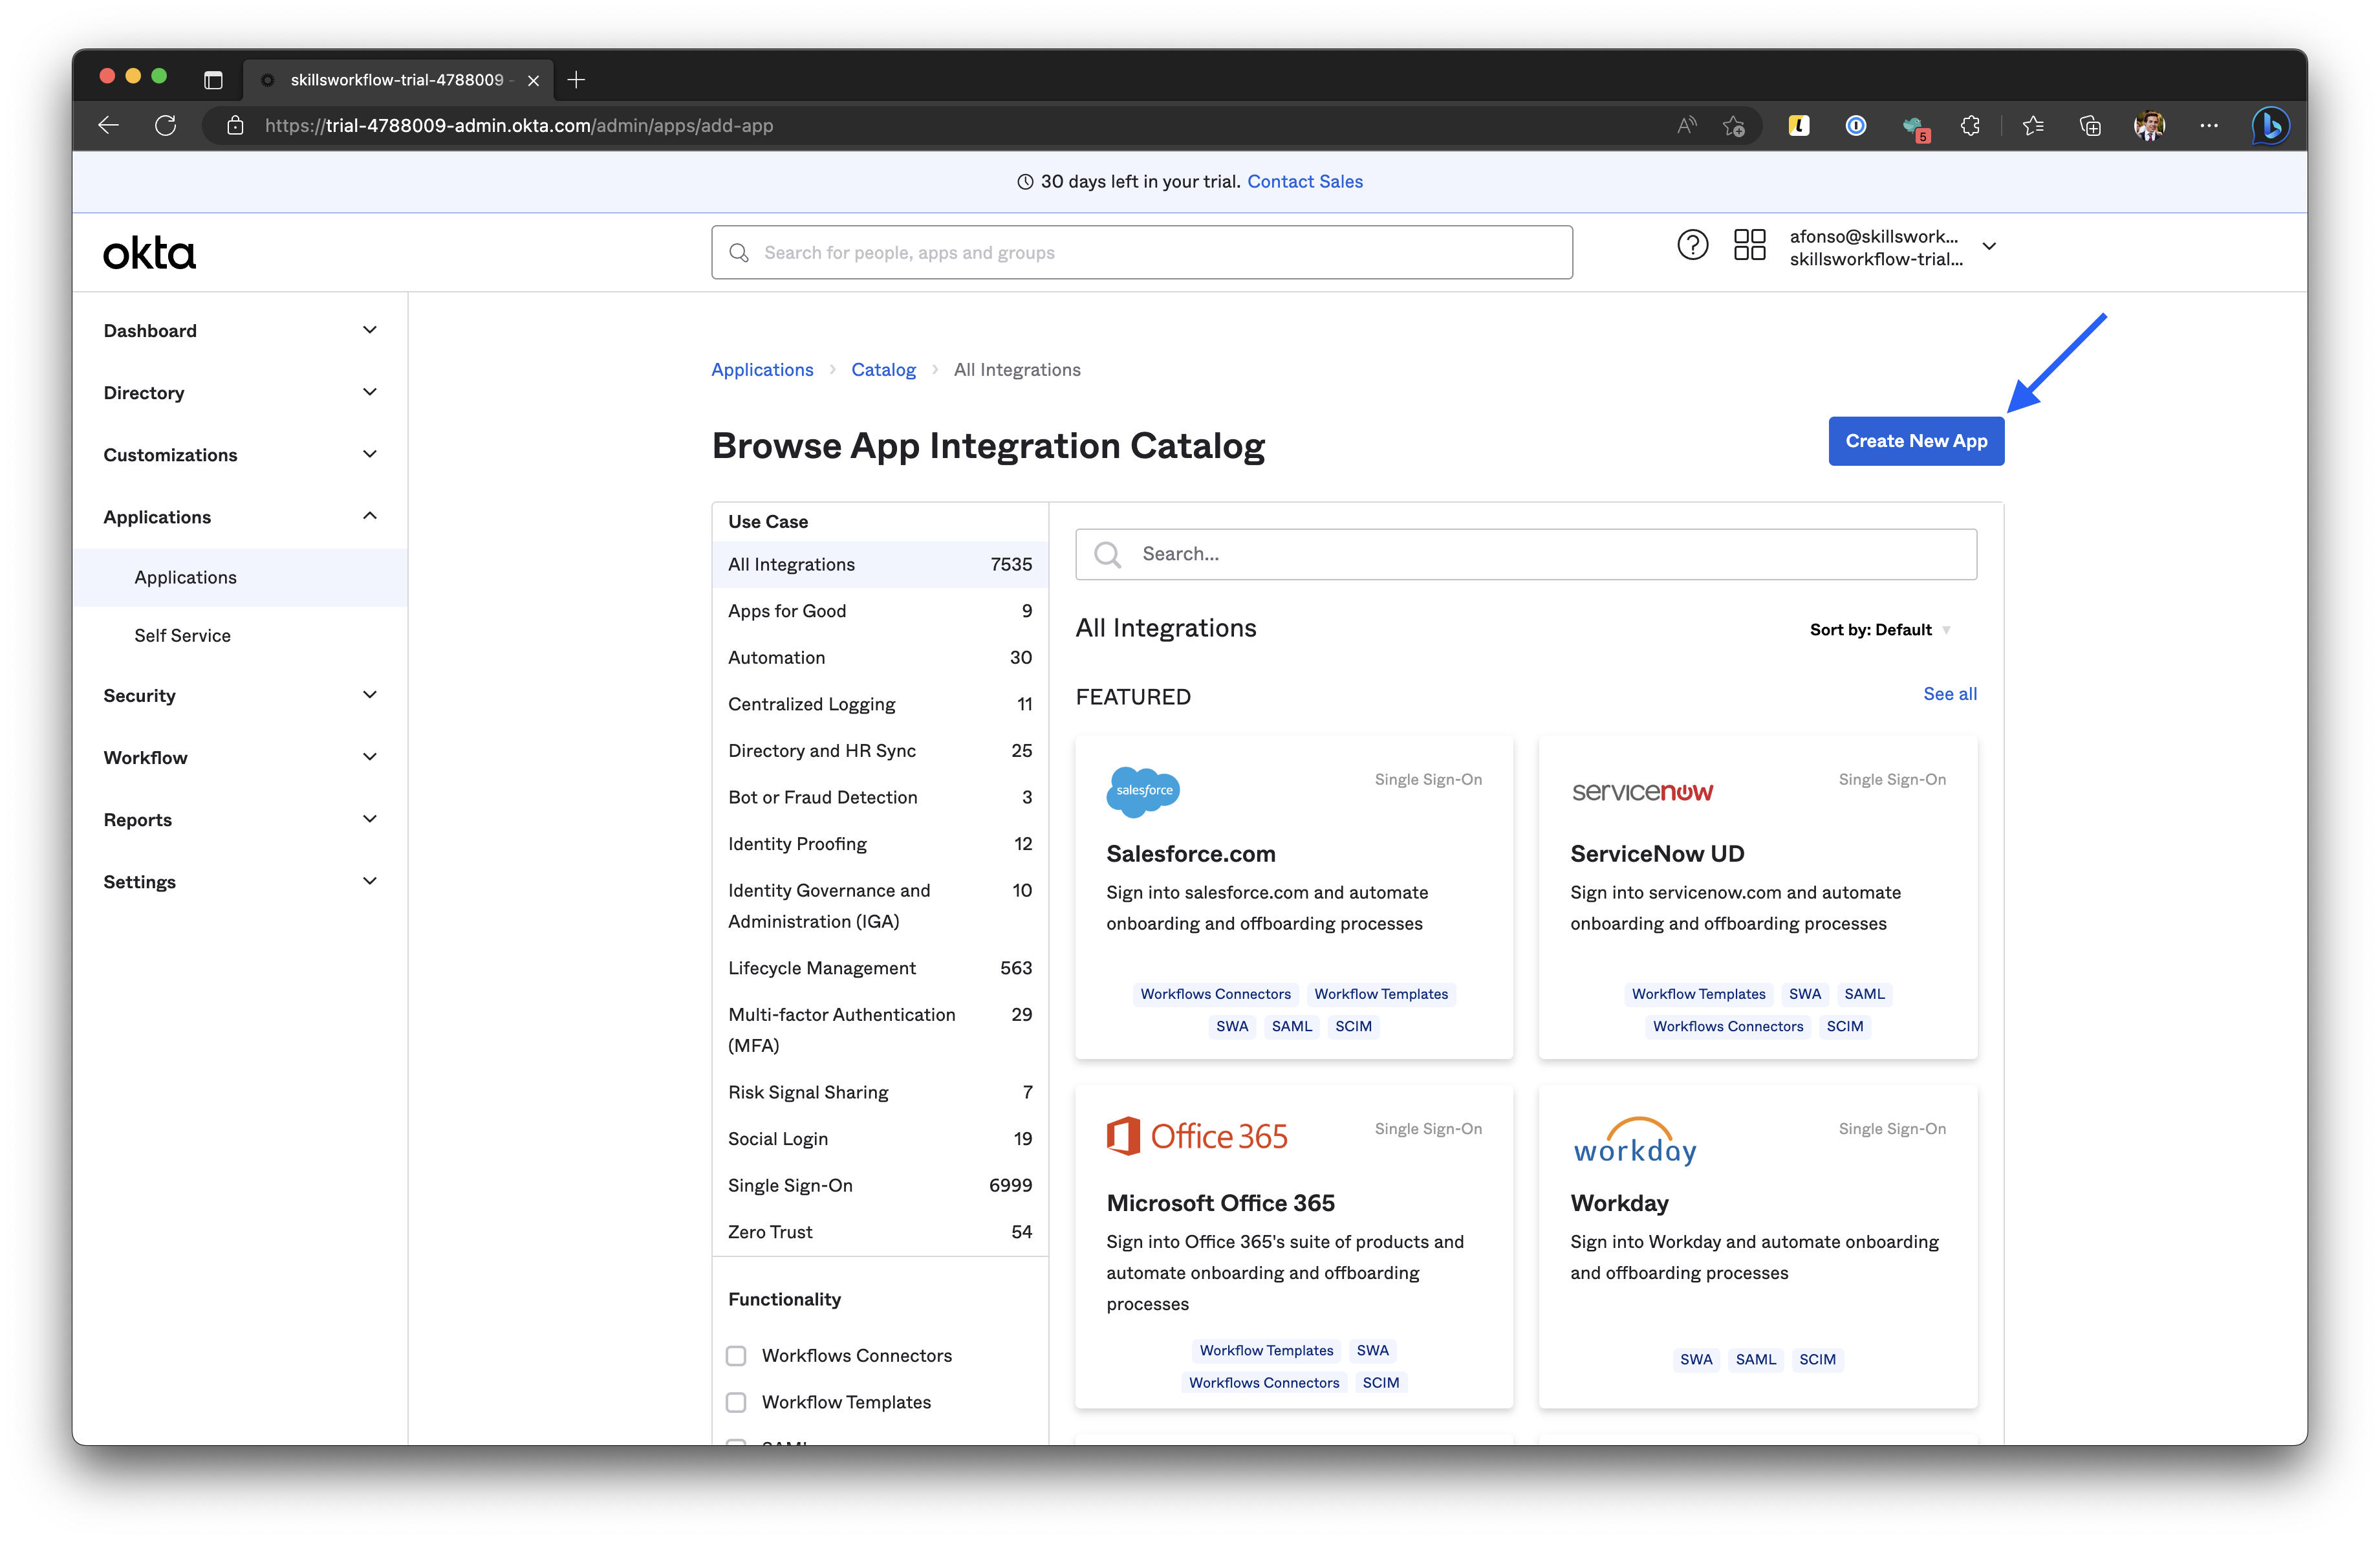
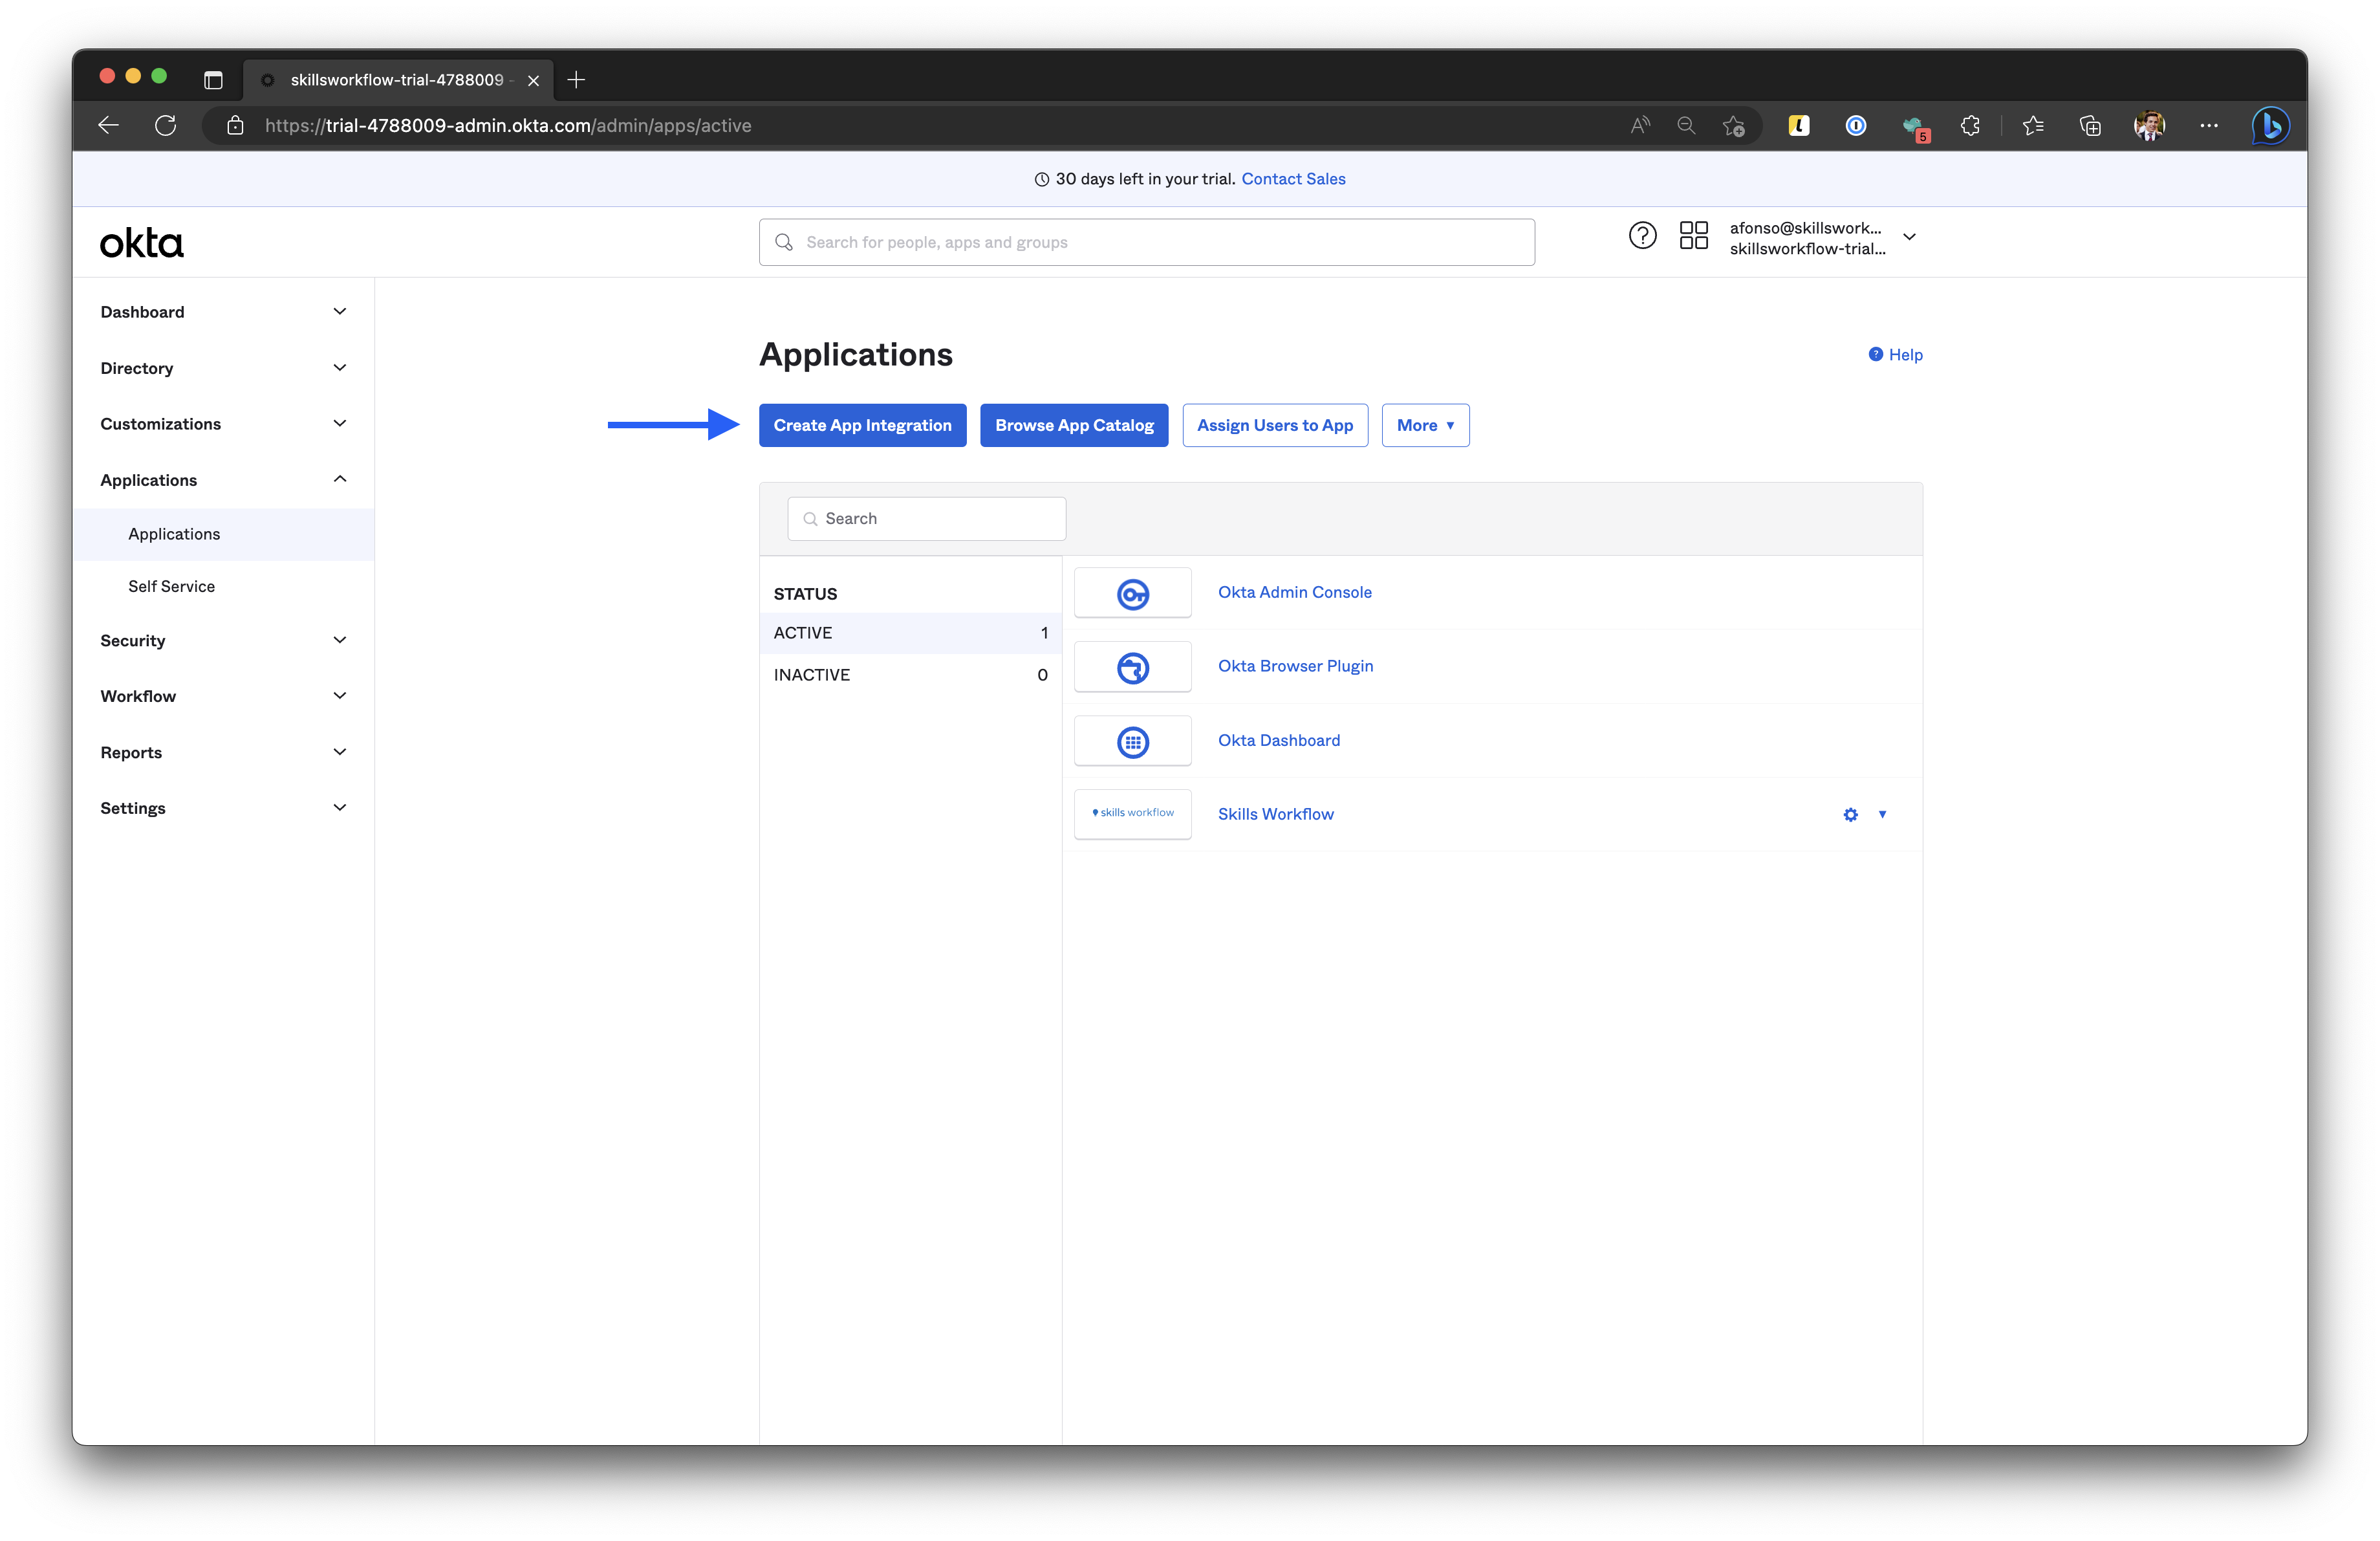
In the Admin center, on the left pane navigate to Applications and click on Create New App.
-
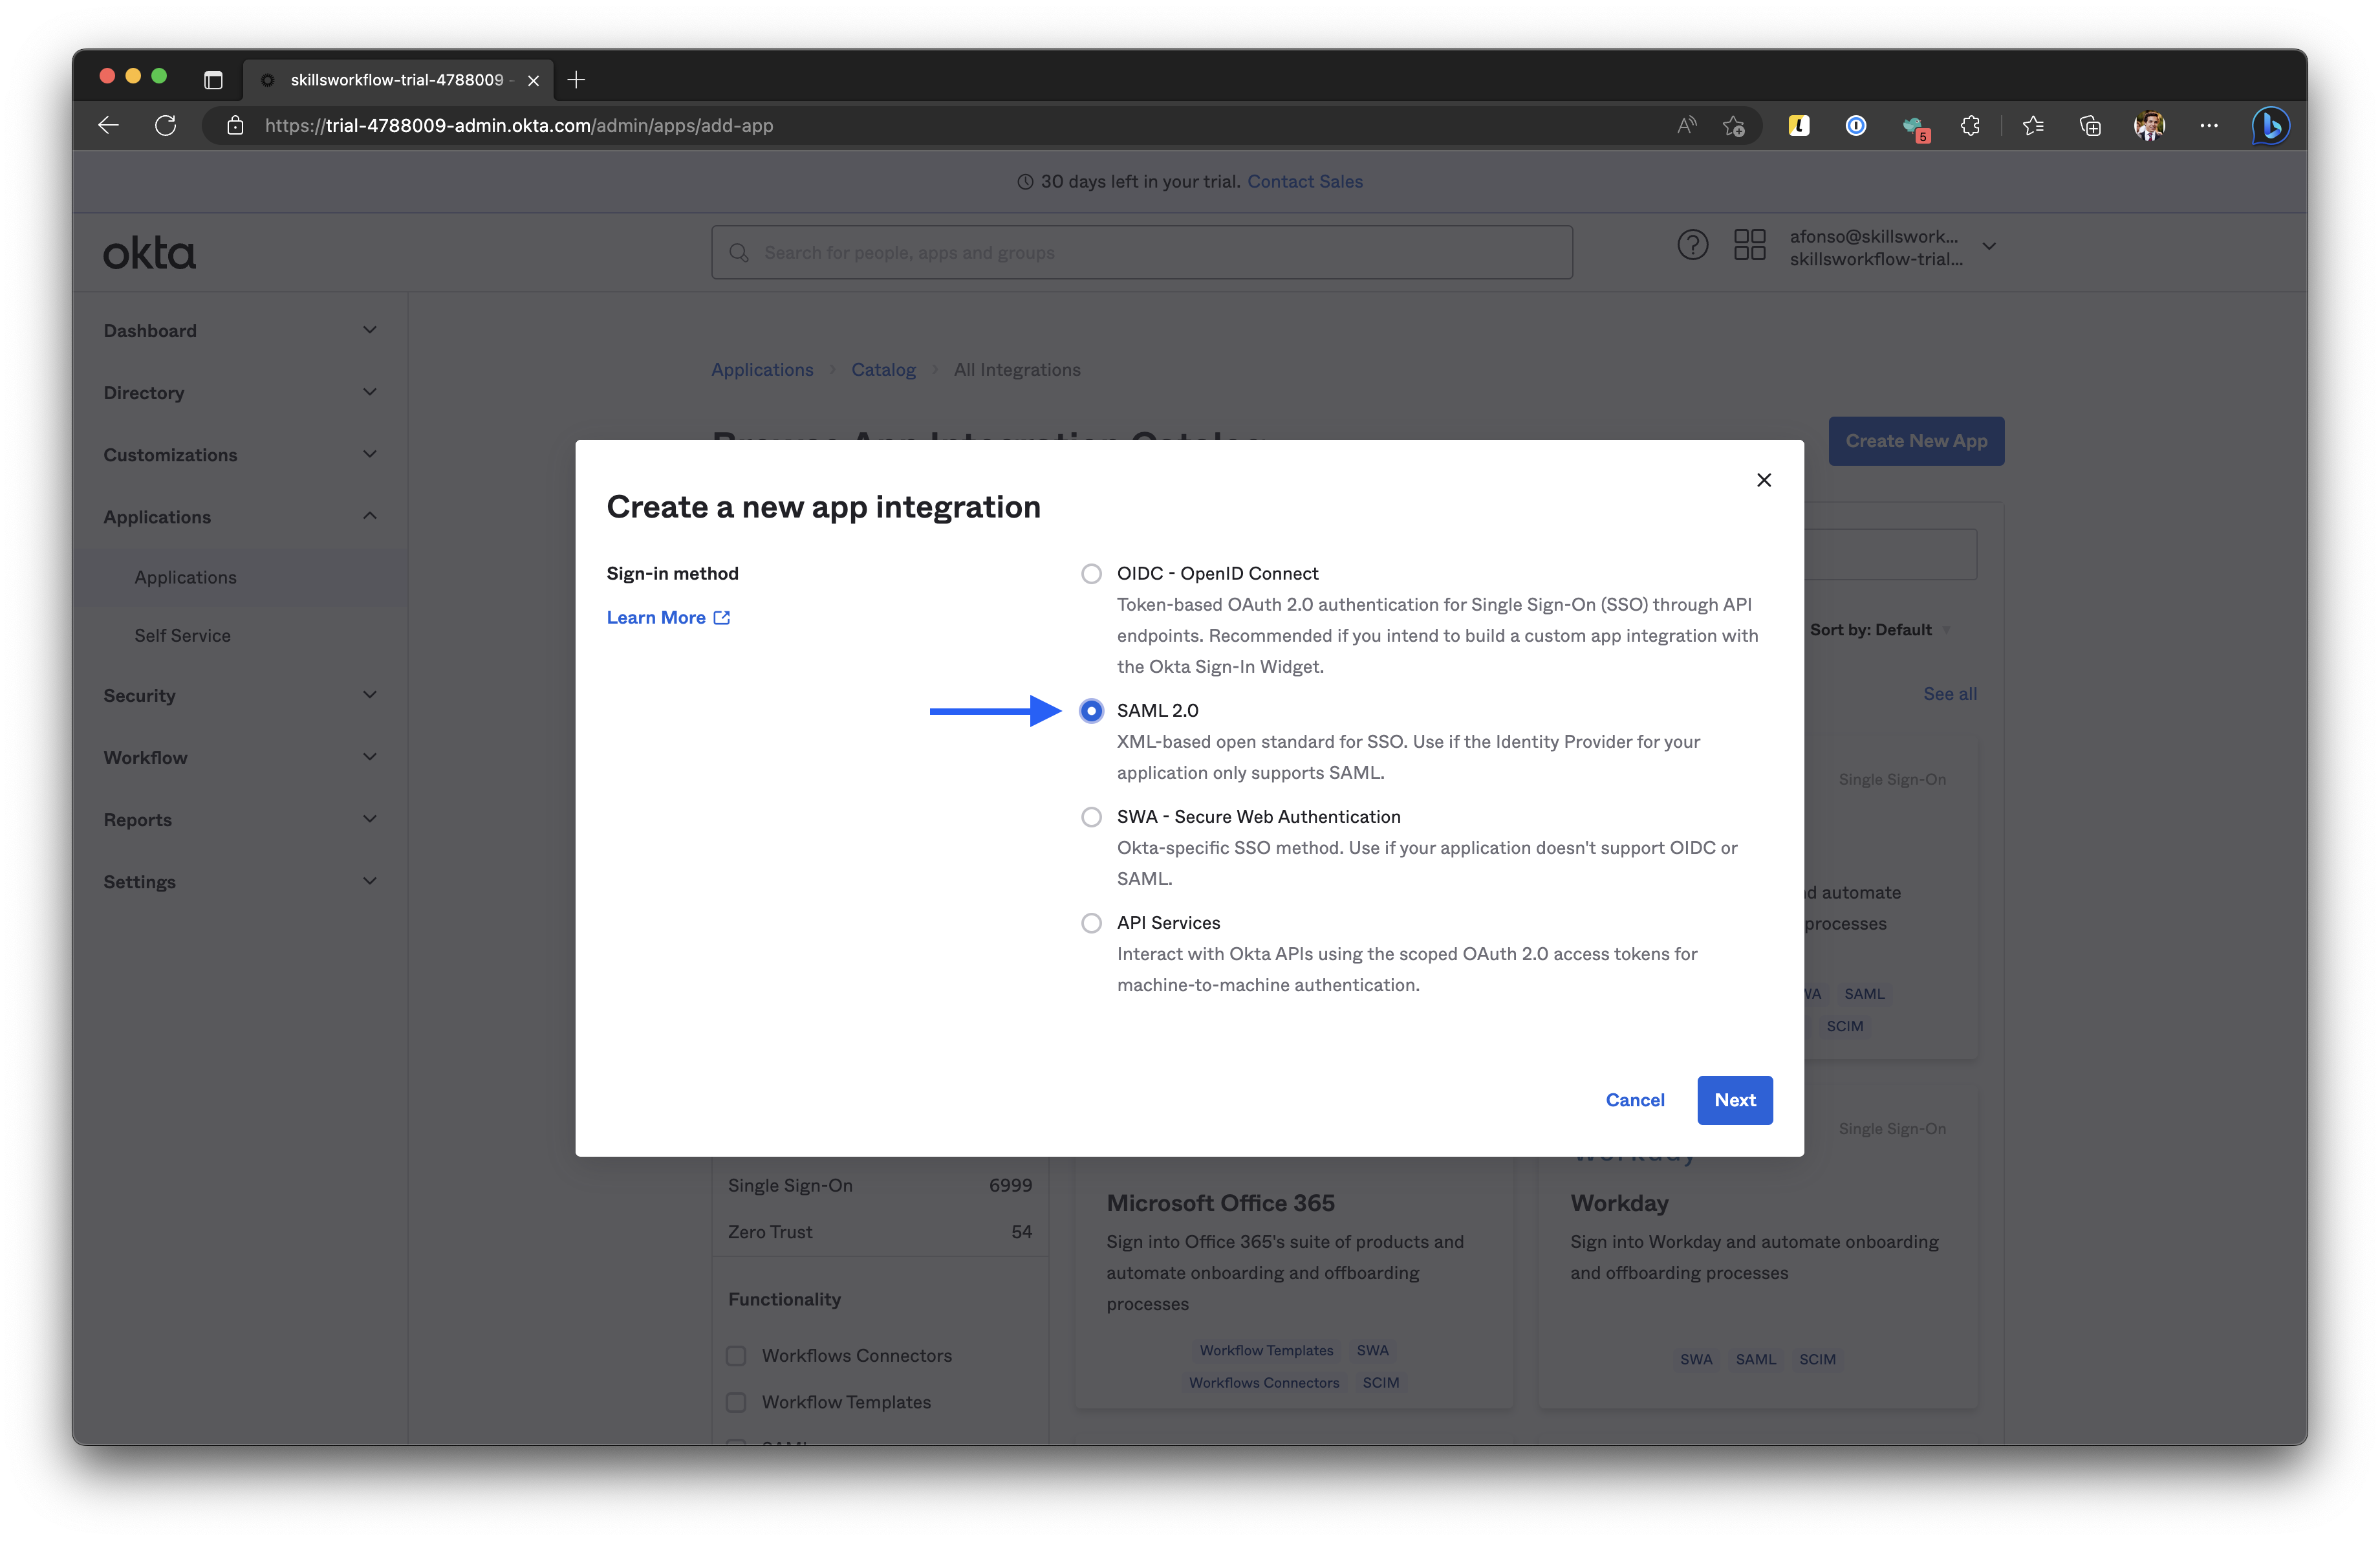
For Sign-in method, select SAML 2.0, and click Next.
-
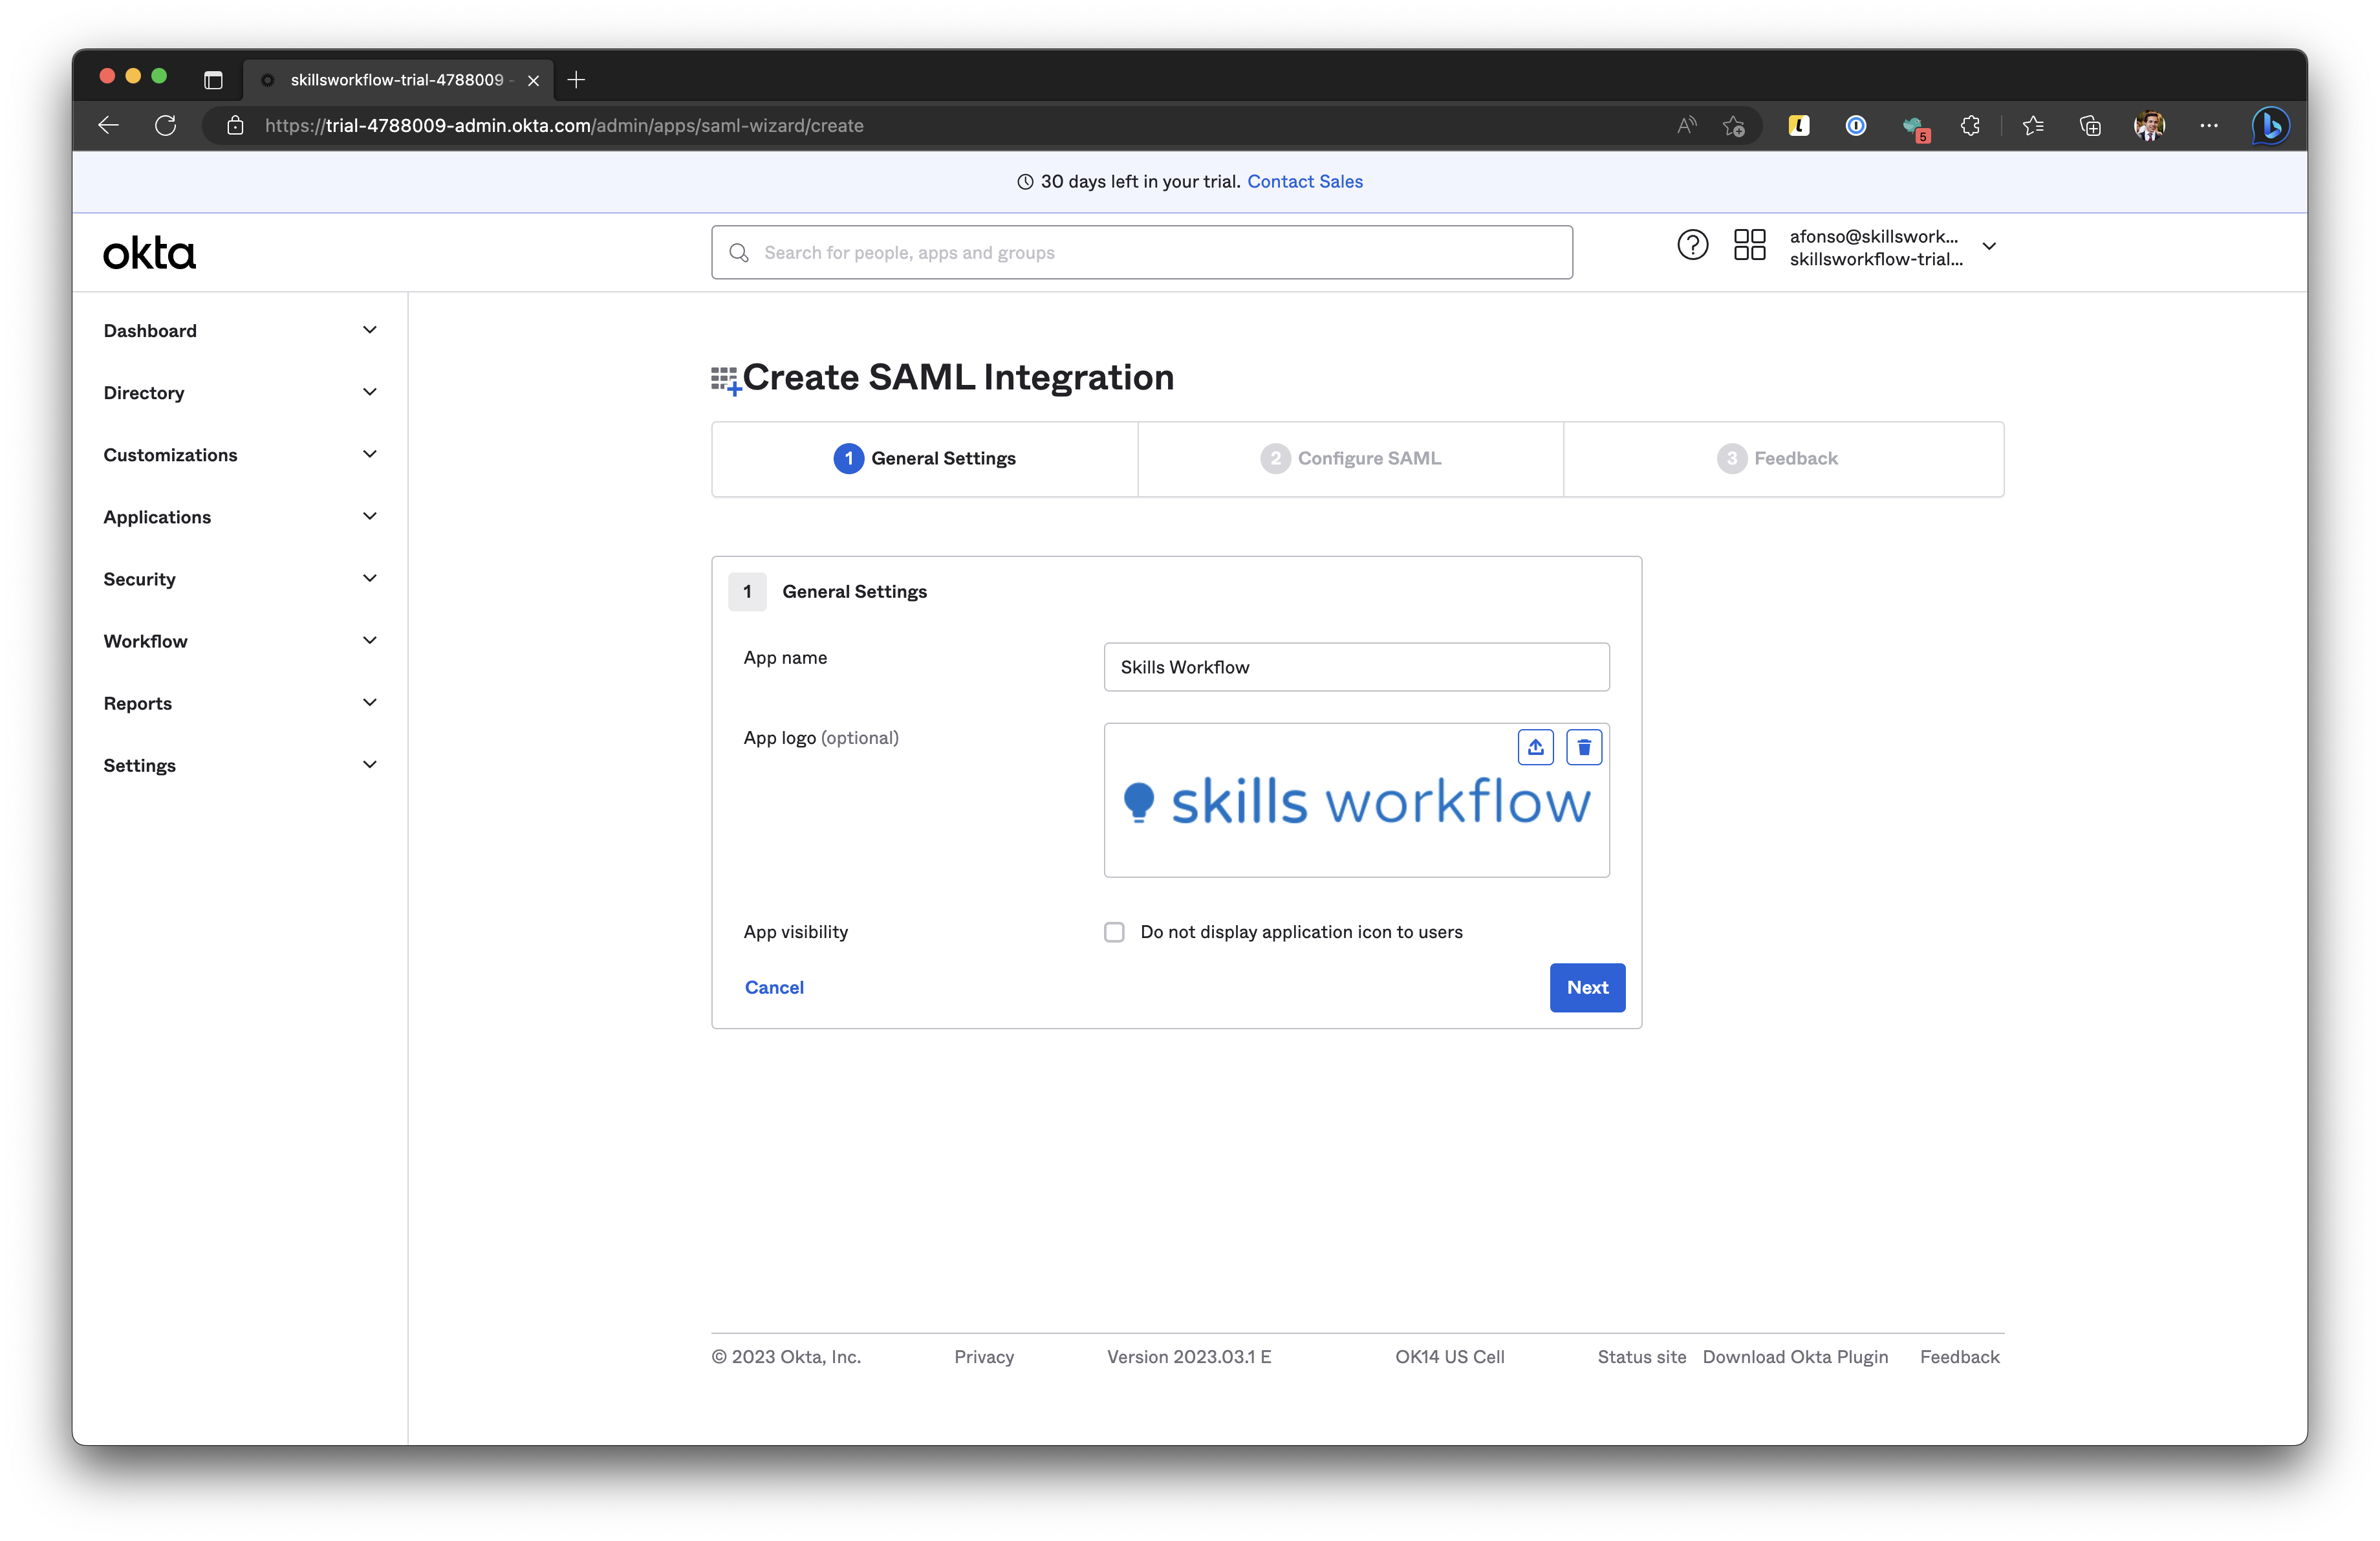
On the General Settings, configure the App Name and App Logo.
-
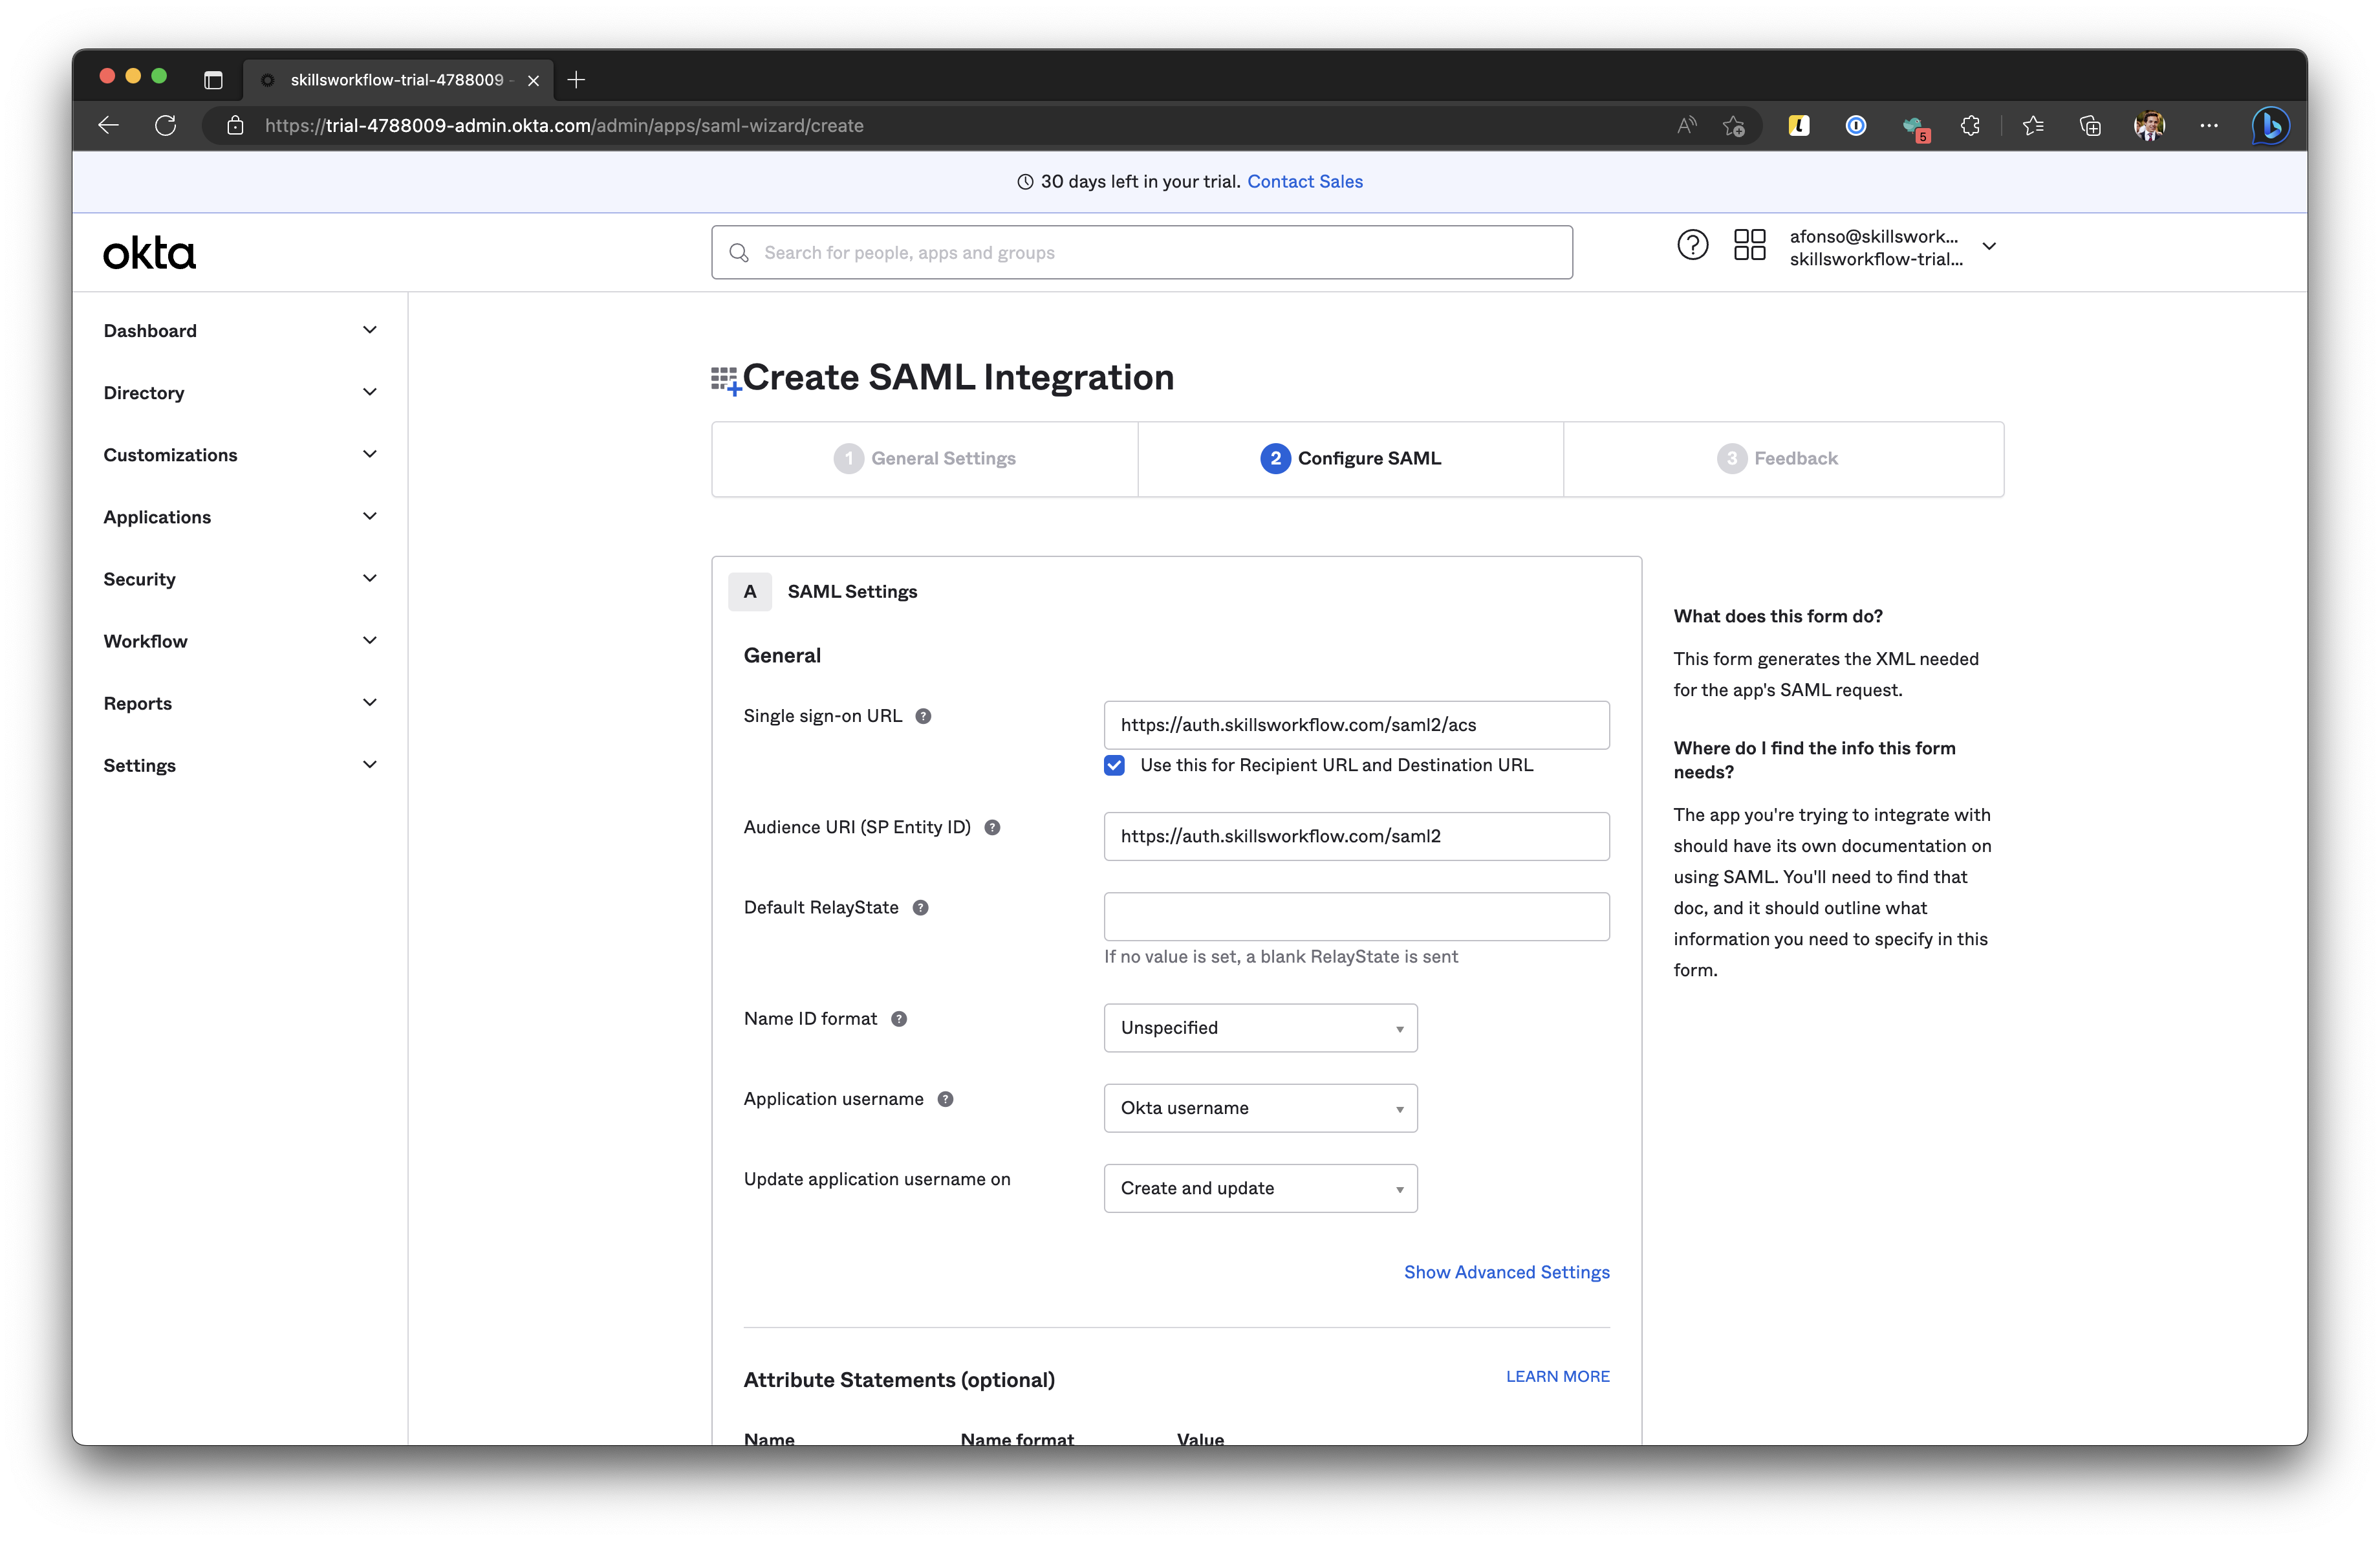
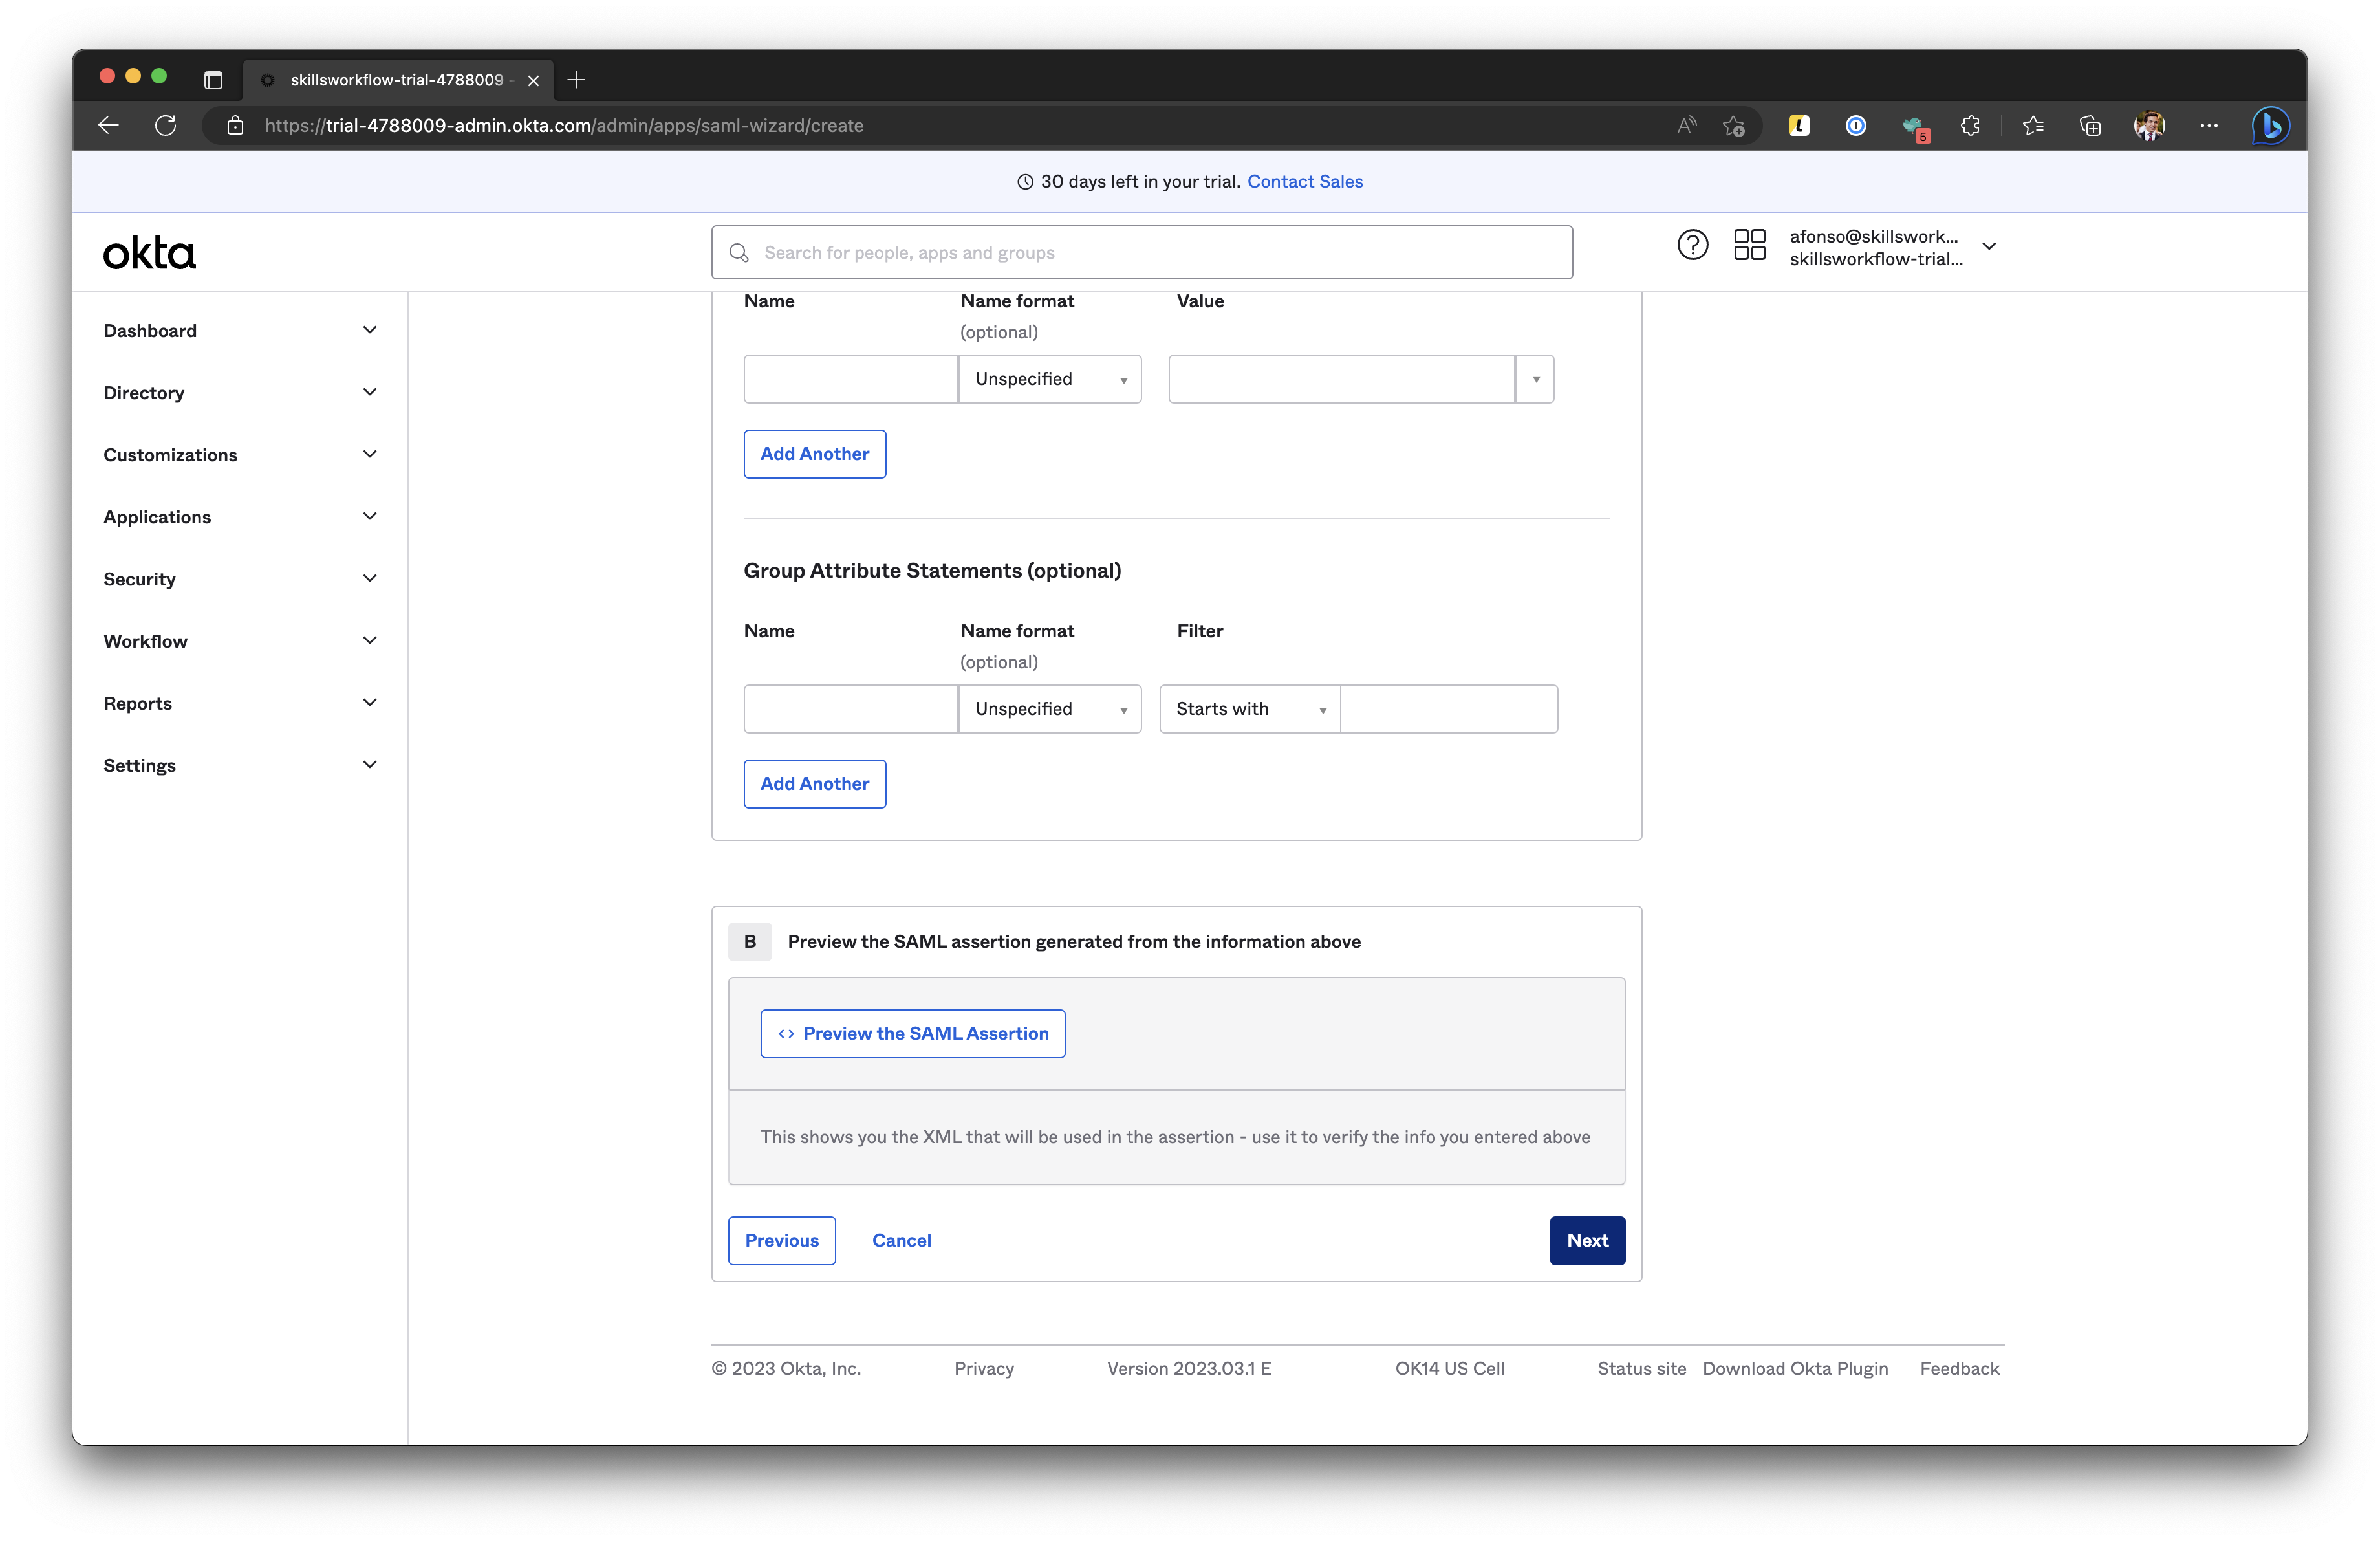
On the SAML Settings section, perform the following steps:
-
In the Single Sign-on URL text box, type the URL:
https://auth.skillsworkflow.com/saml2/acs -
In the Audiance URI (SP Entity ID) text box, type the URL:
https://auth.skillsworkflow.com/saml2 -
Leave the other settings with the default values
-
-
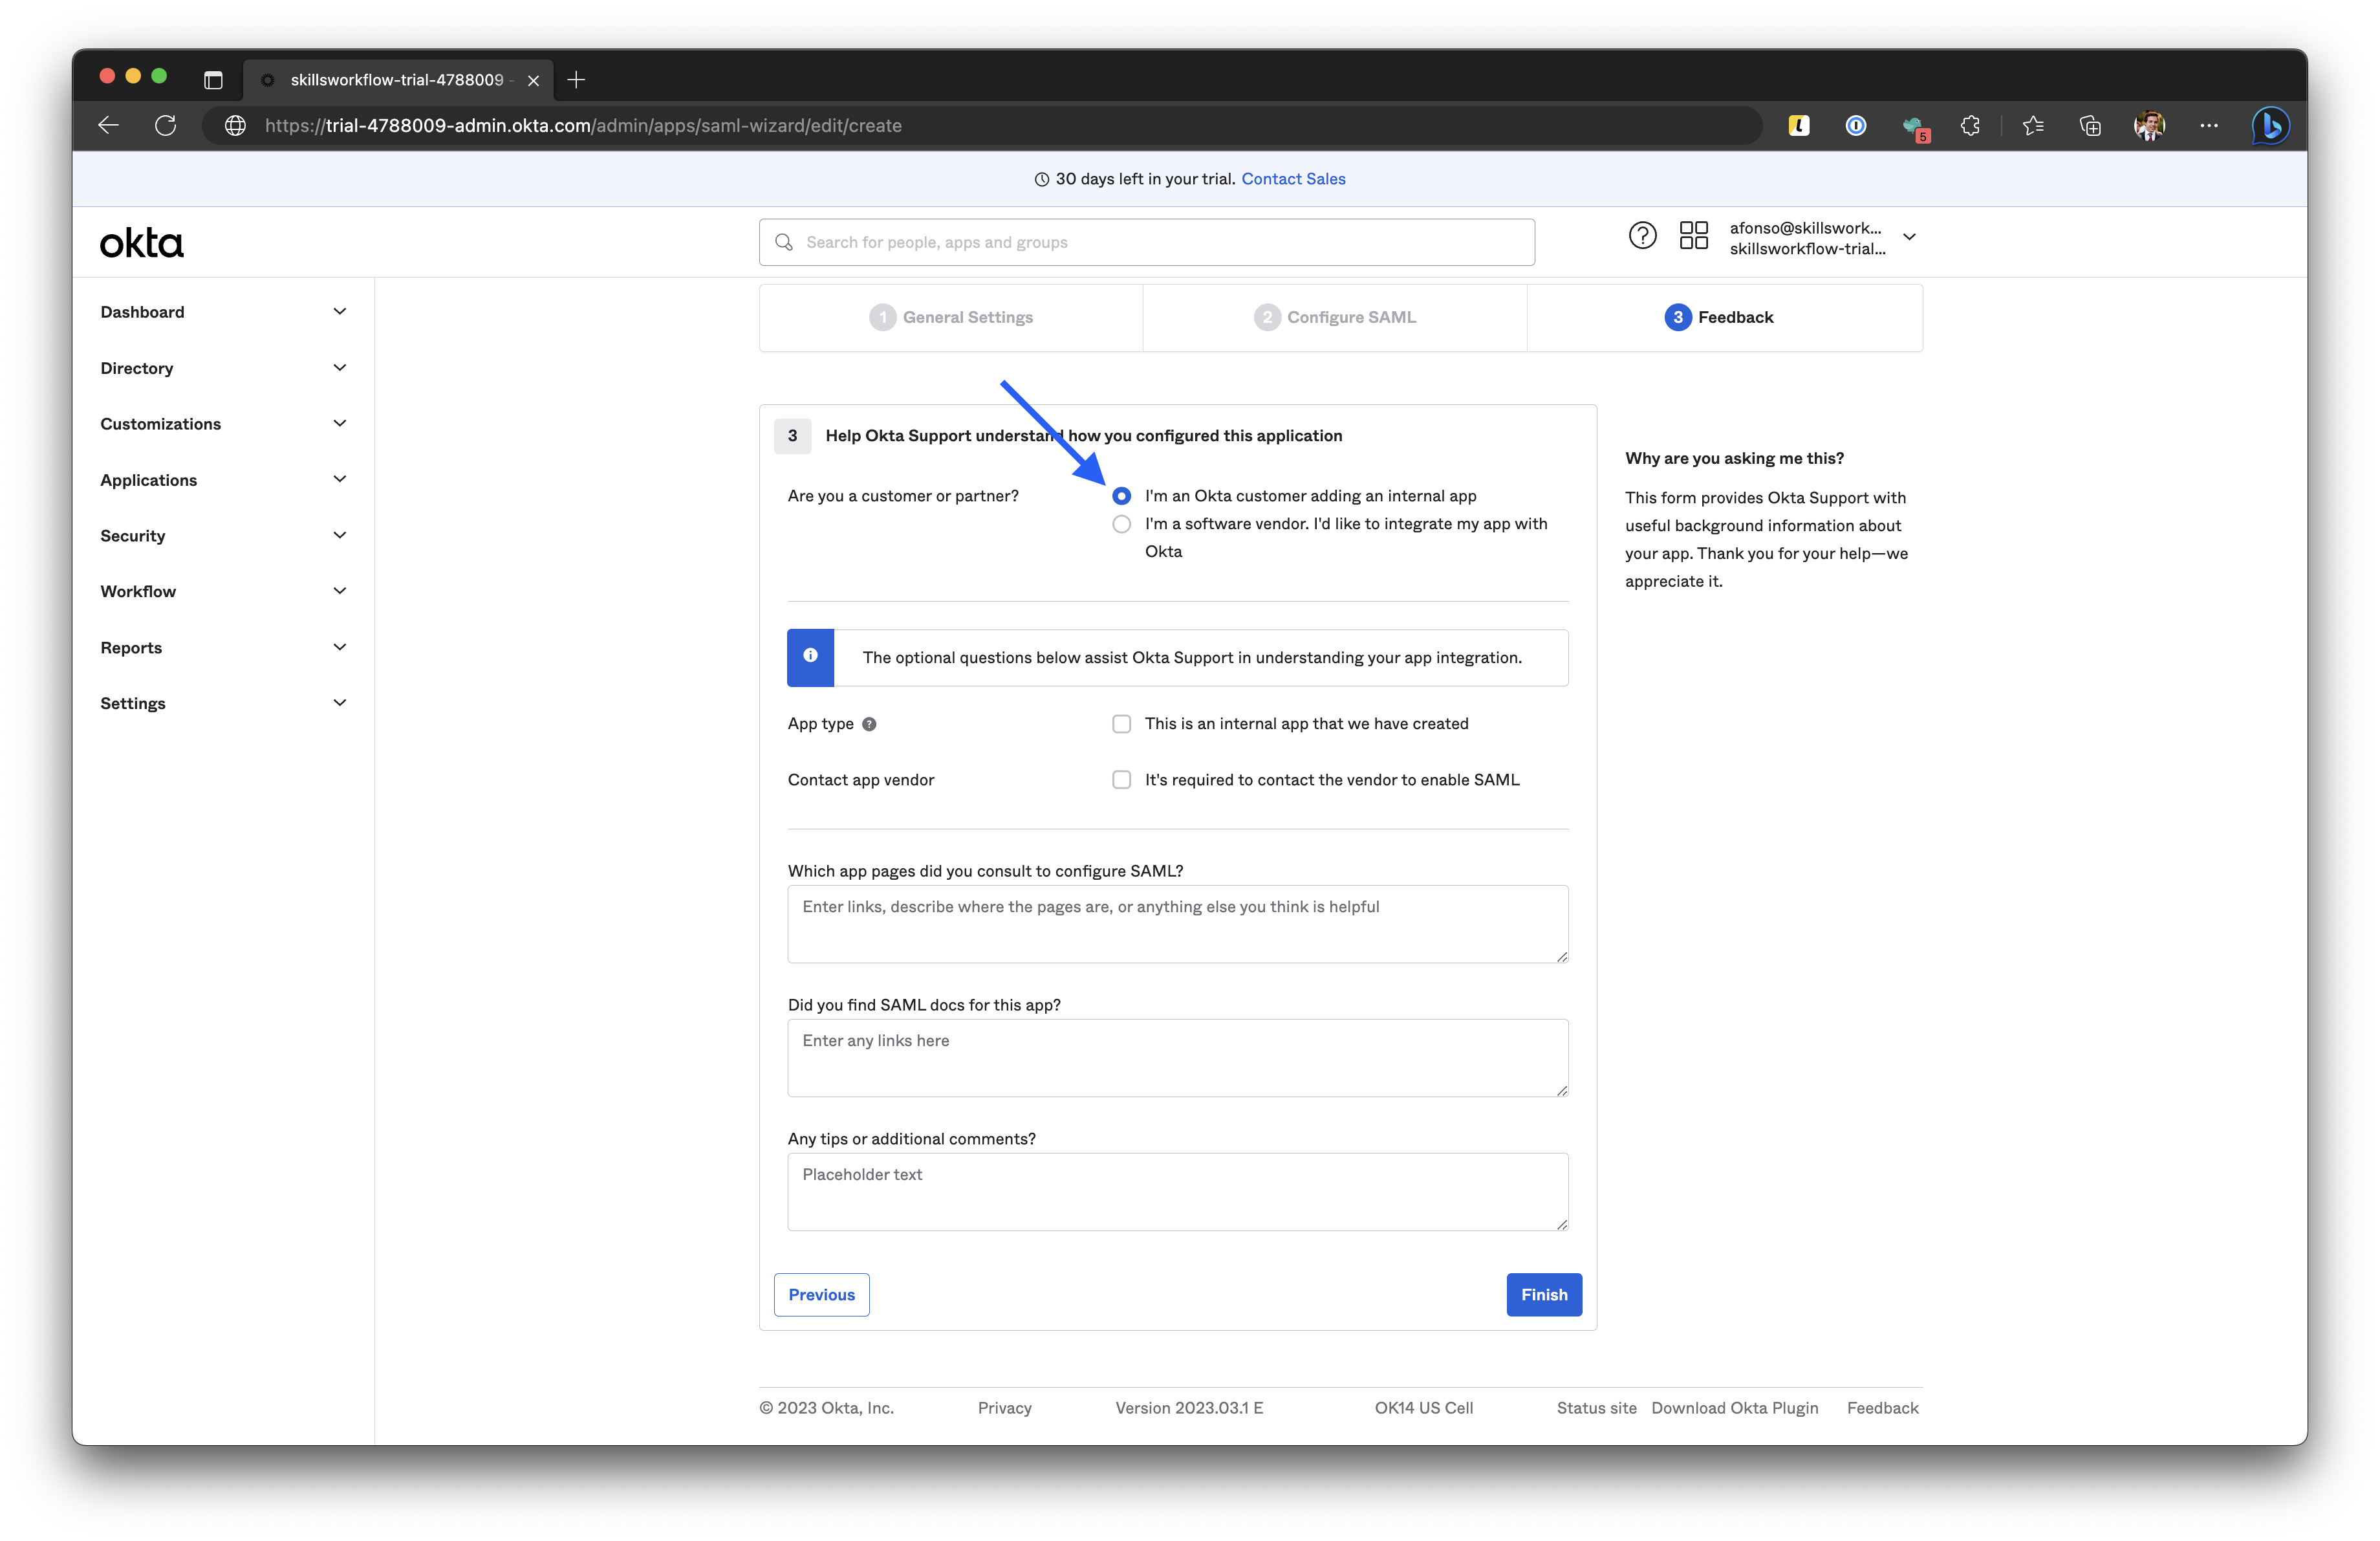
On the Are you a Customer or partner section, select the I'm an Okta customer adding an internal app, and then click on Finish.
-
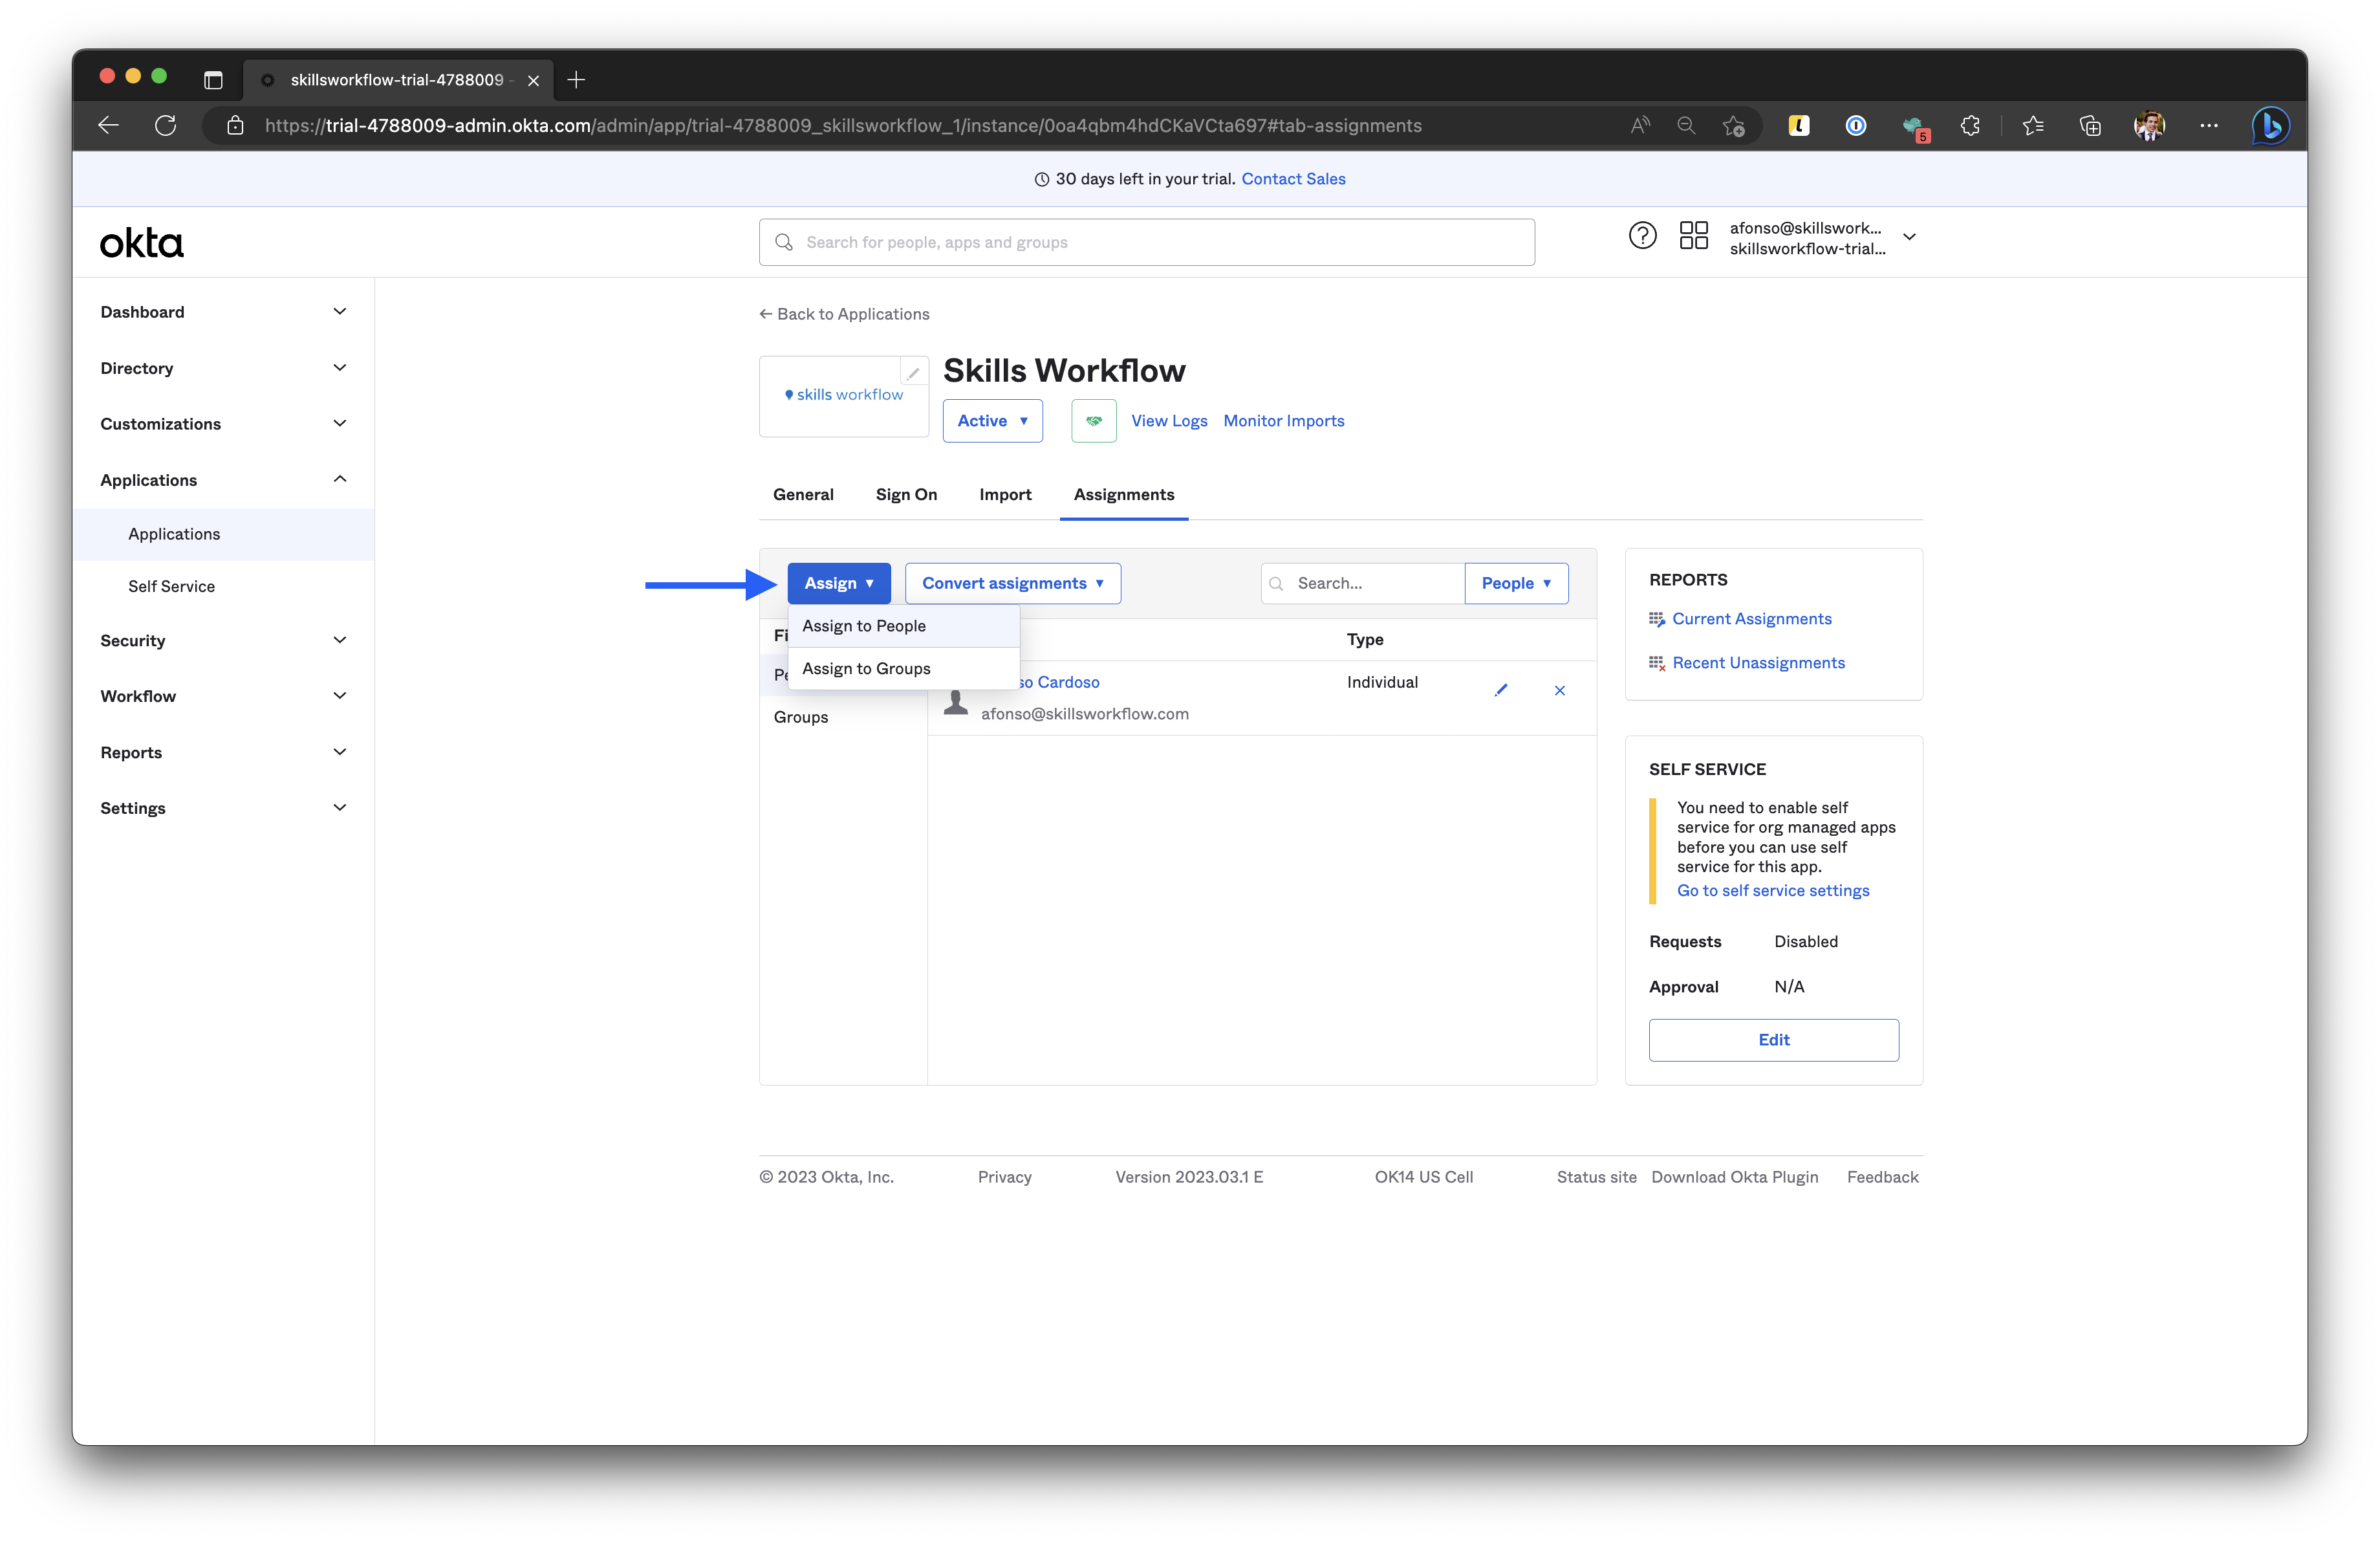
Once the app is created, go to the Assignments tab, assign the people or groups that will have access to use the SSO App.
-
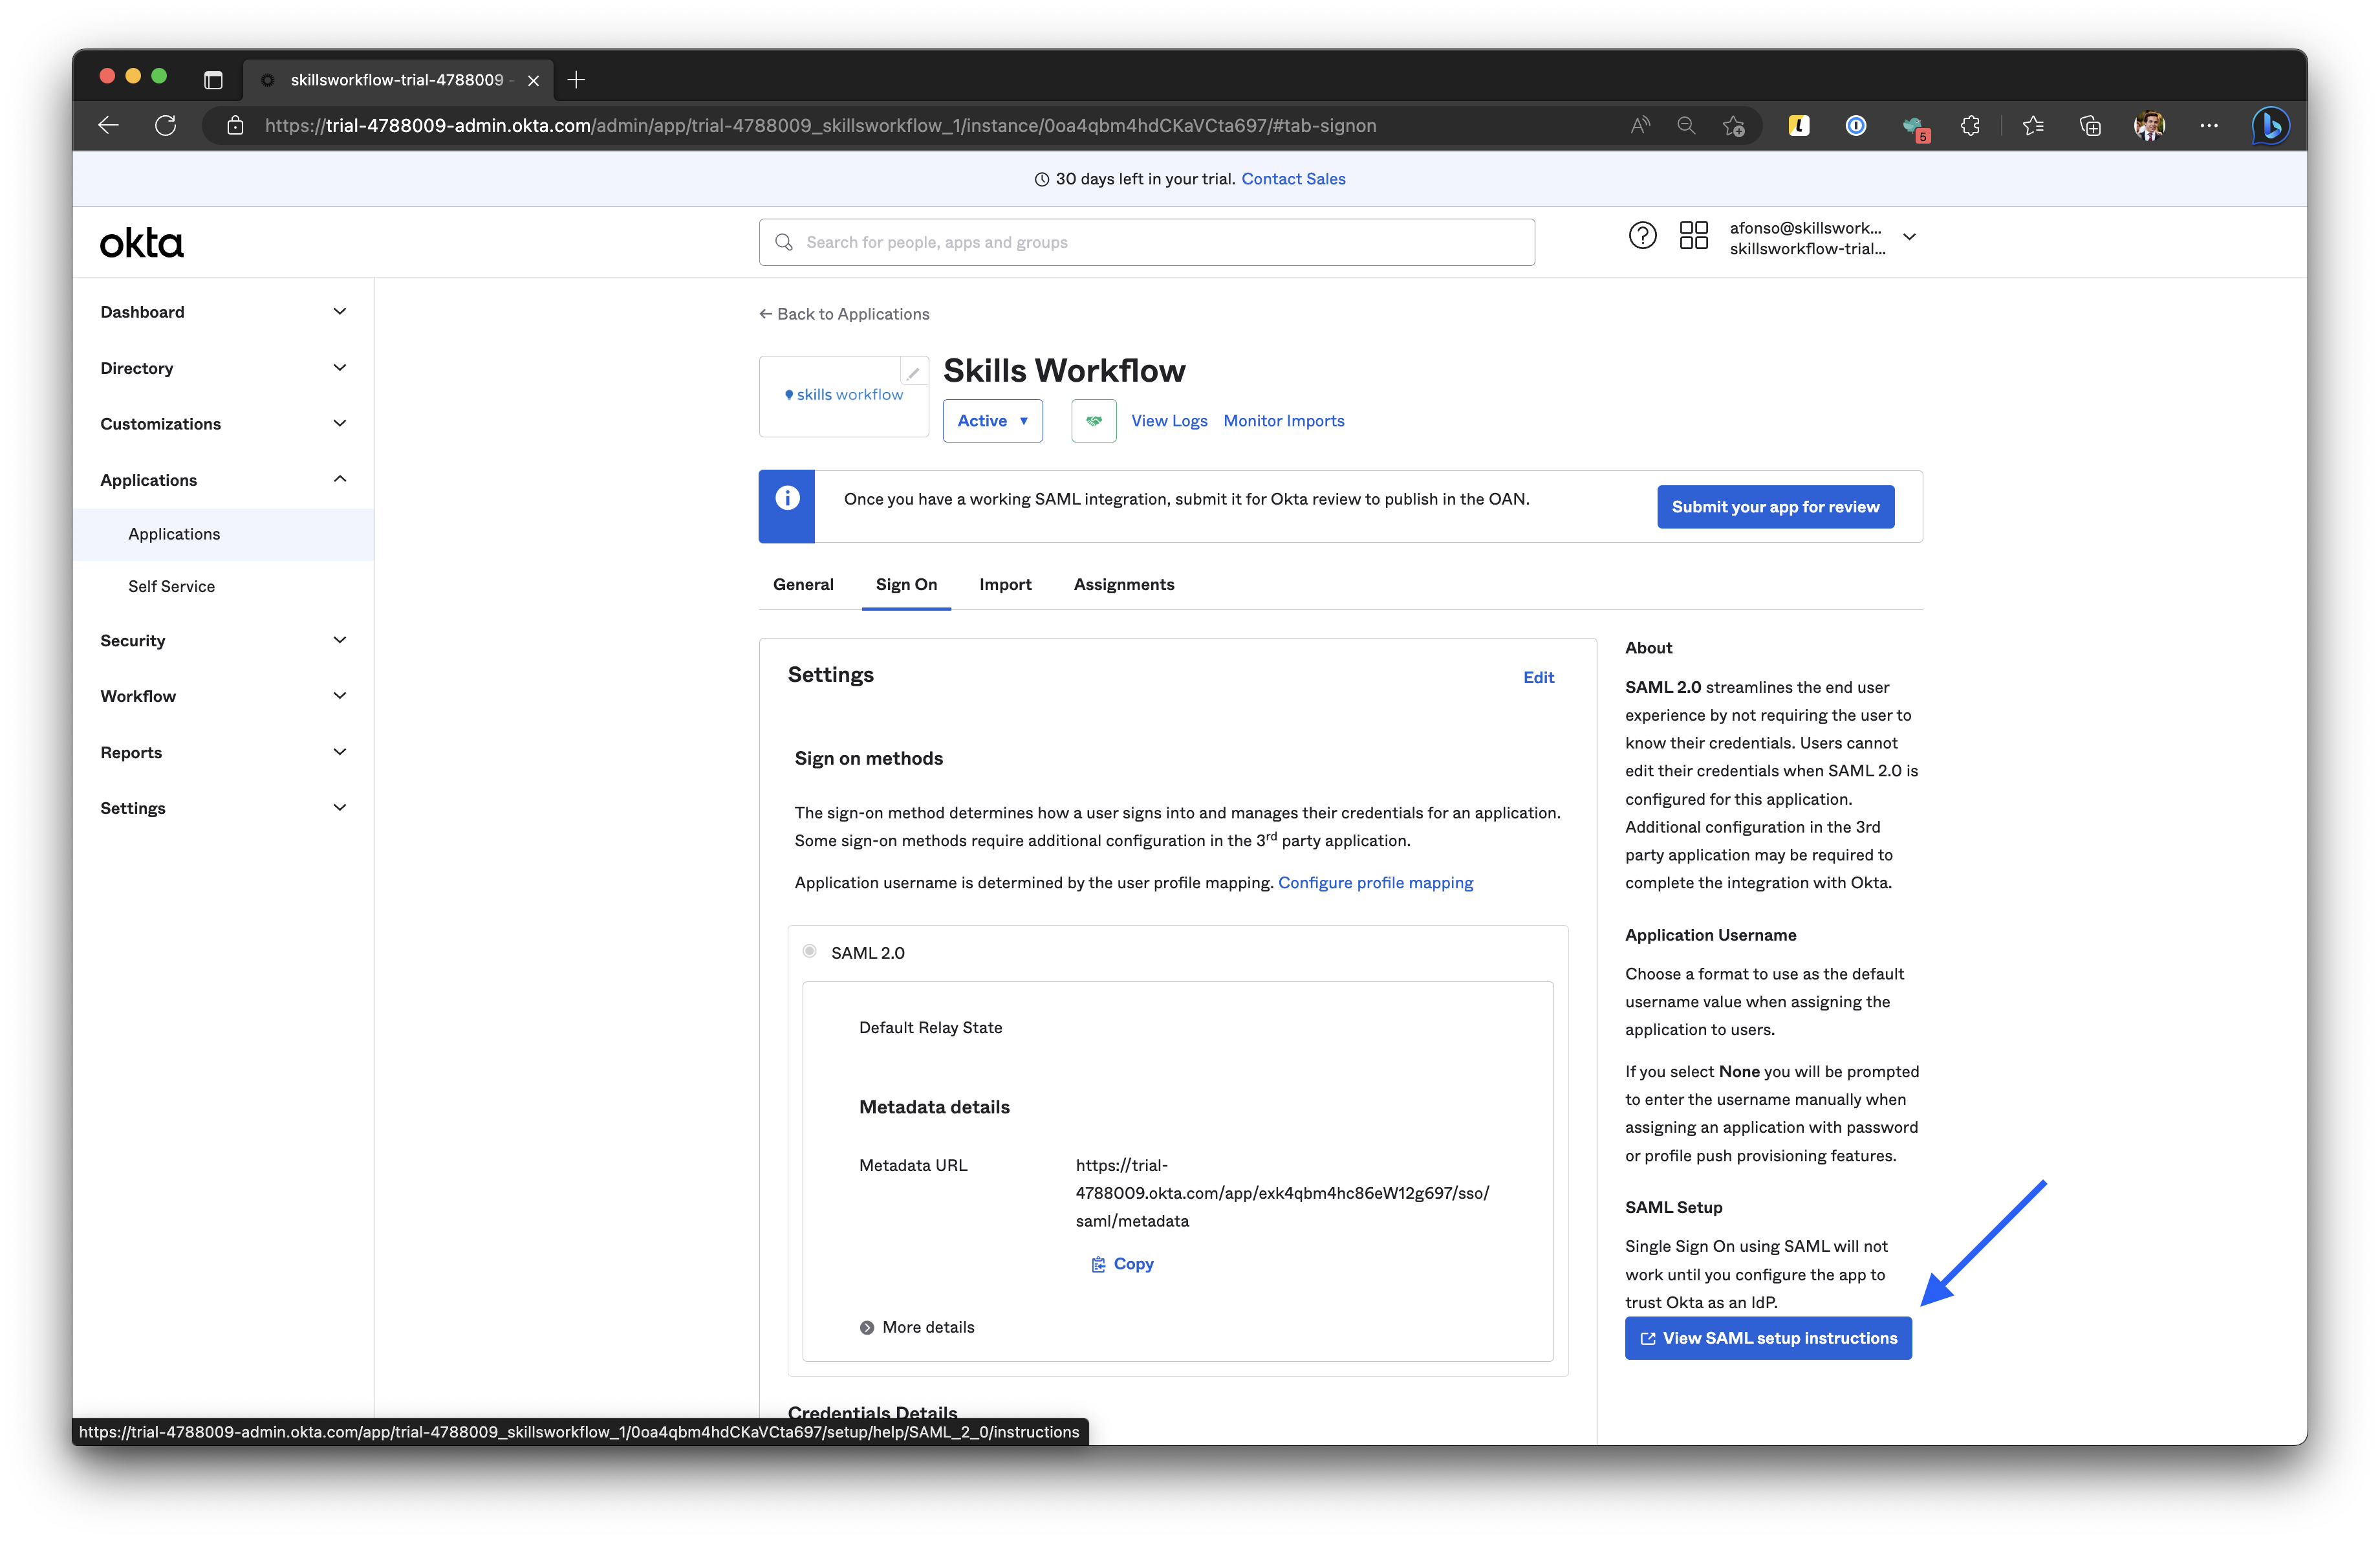
On the Sign On tab, click on the View SAML setup instructions.
-
Copy the configurations to the system SSO configuration, by accessing the Maintenance and navigating to SSO page.
- Okta Identity Provider Single Sign-On URL to the system
SSO Service Url - Okta Identity Provider Issuer to the system
Entity ID - Okta X.509 Certificate to the system
Certificate
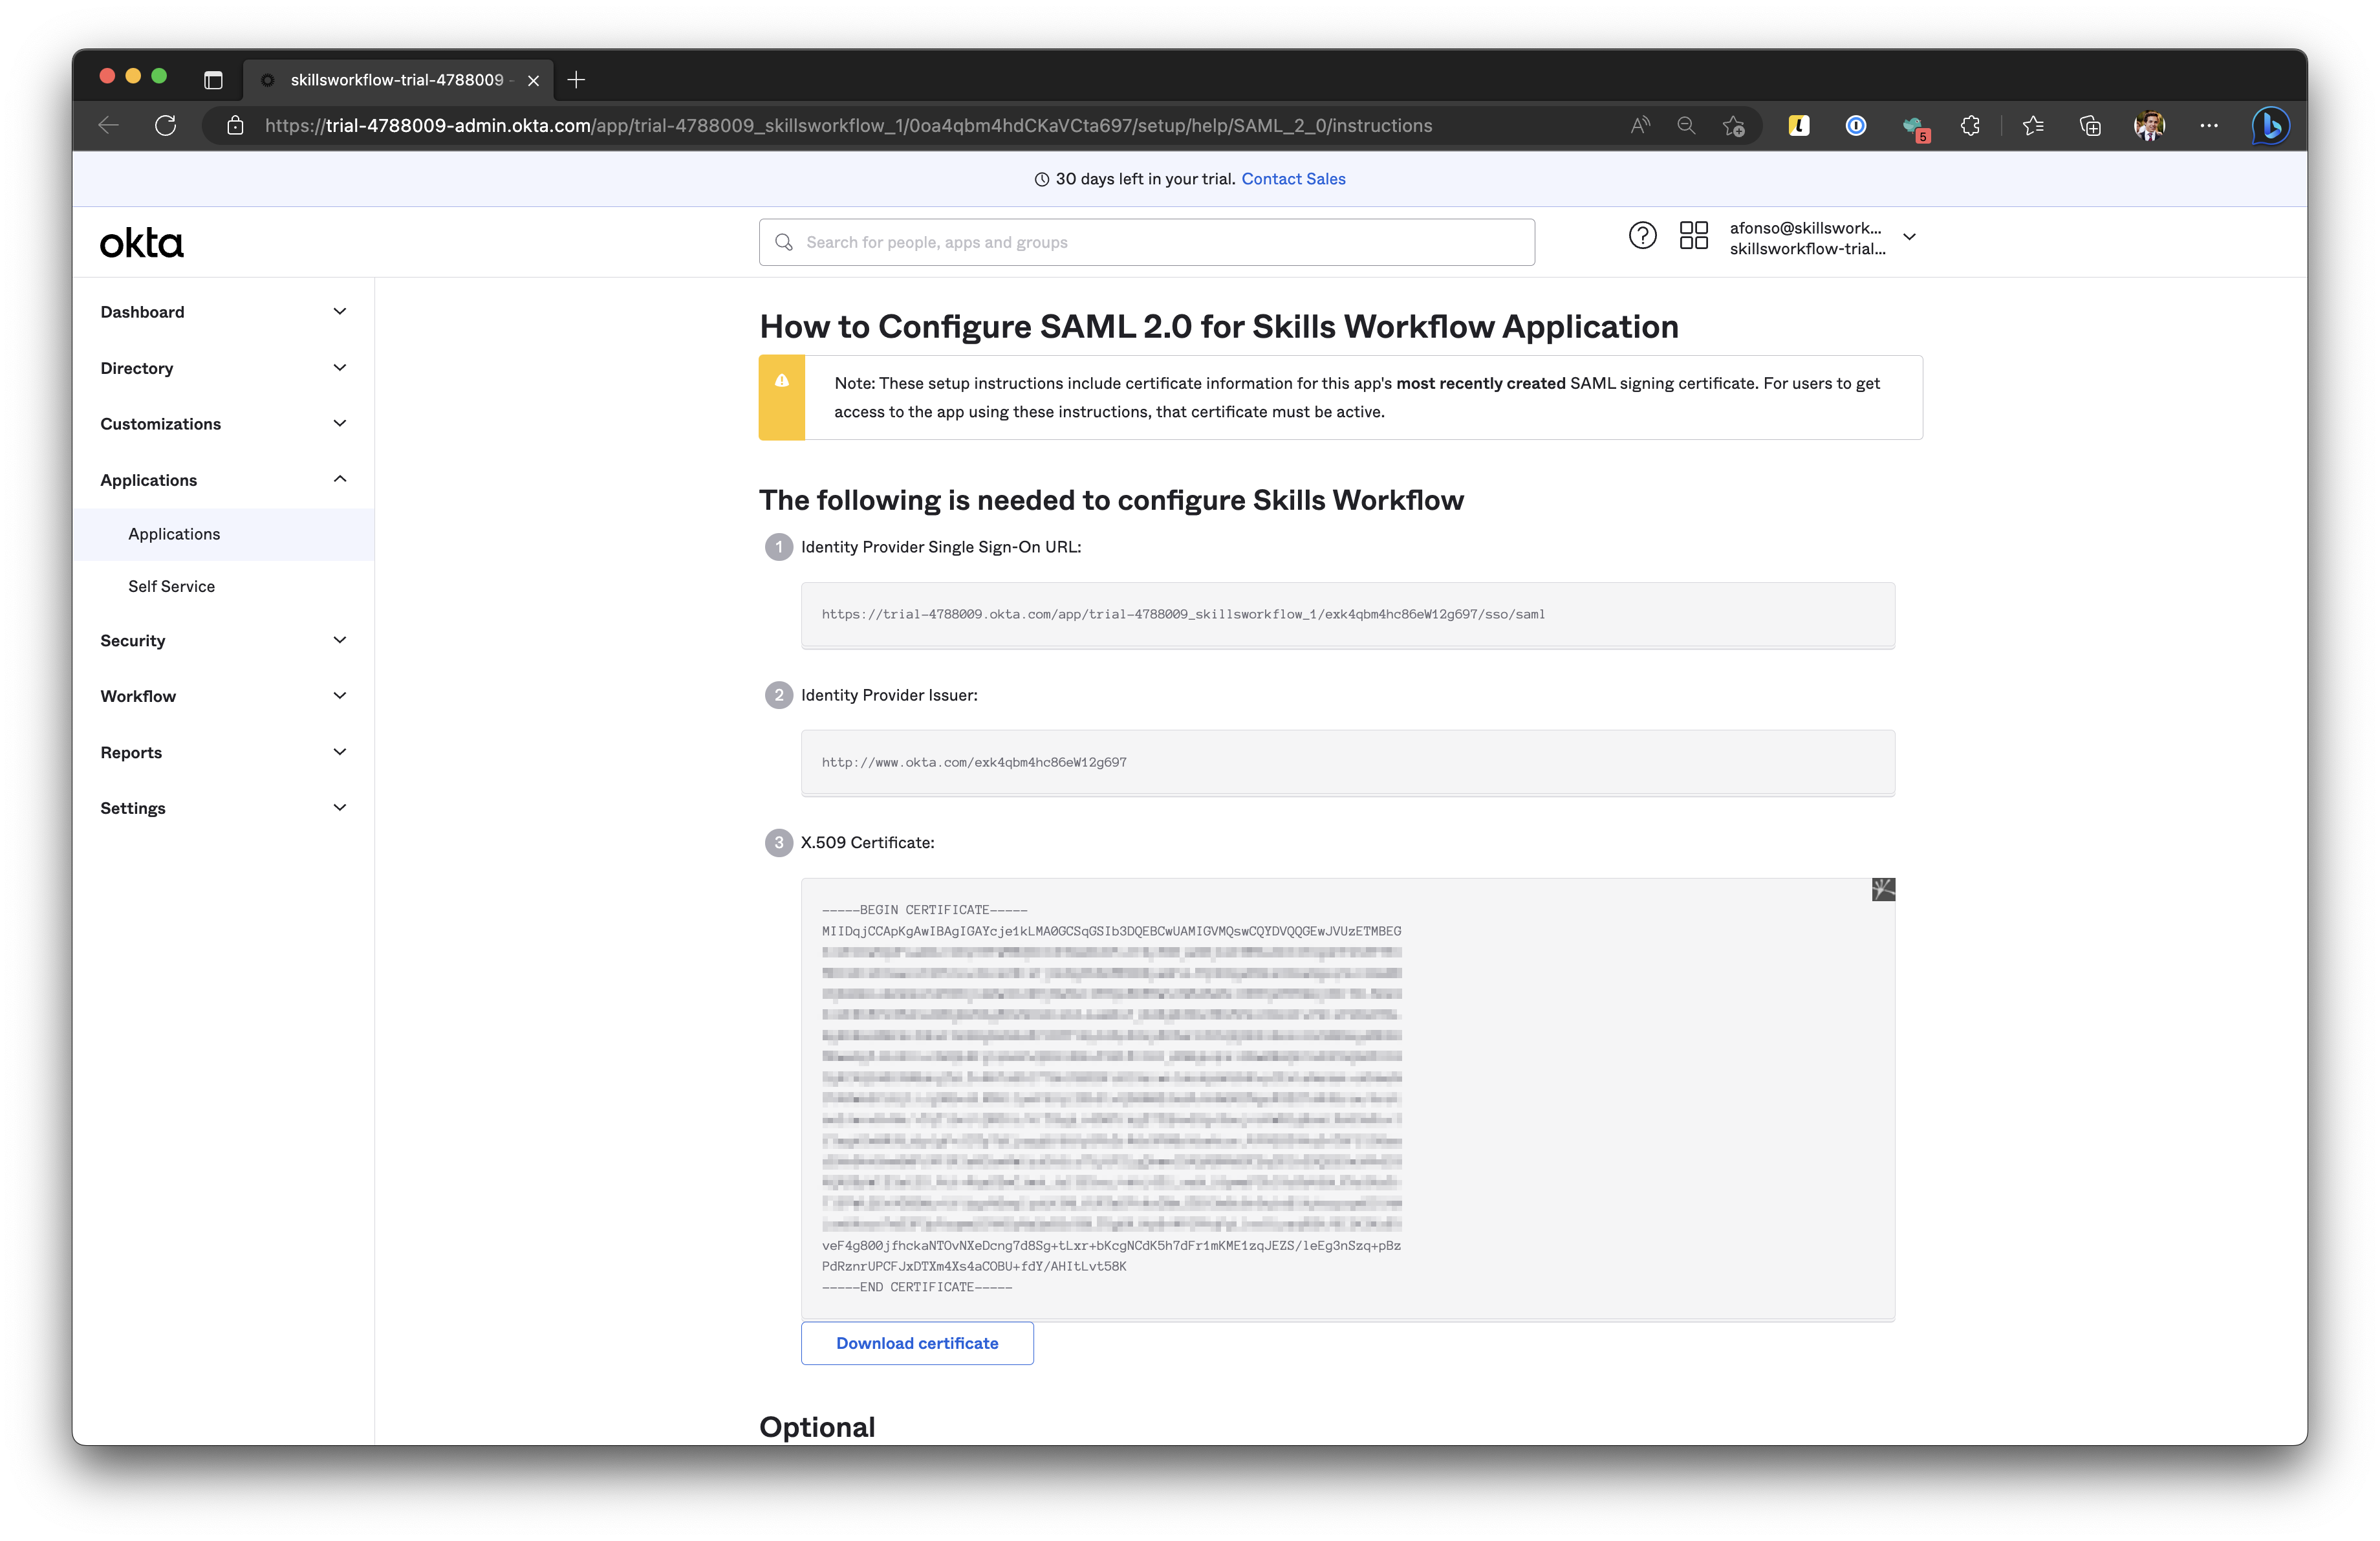
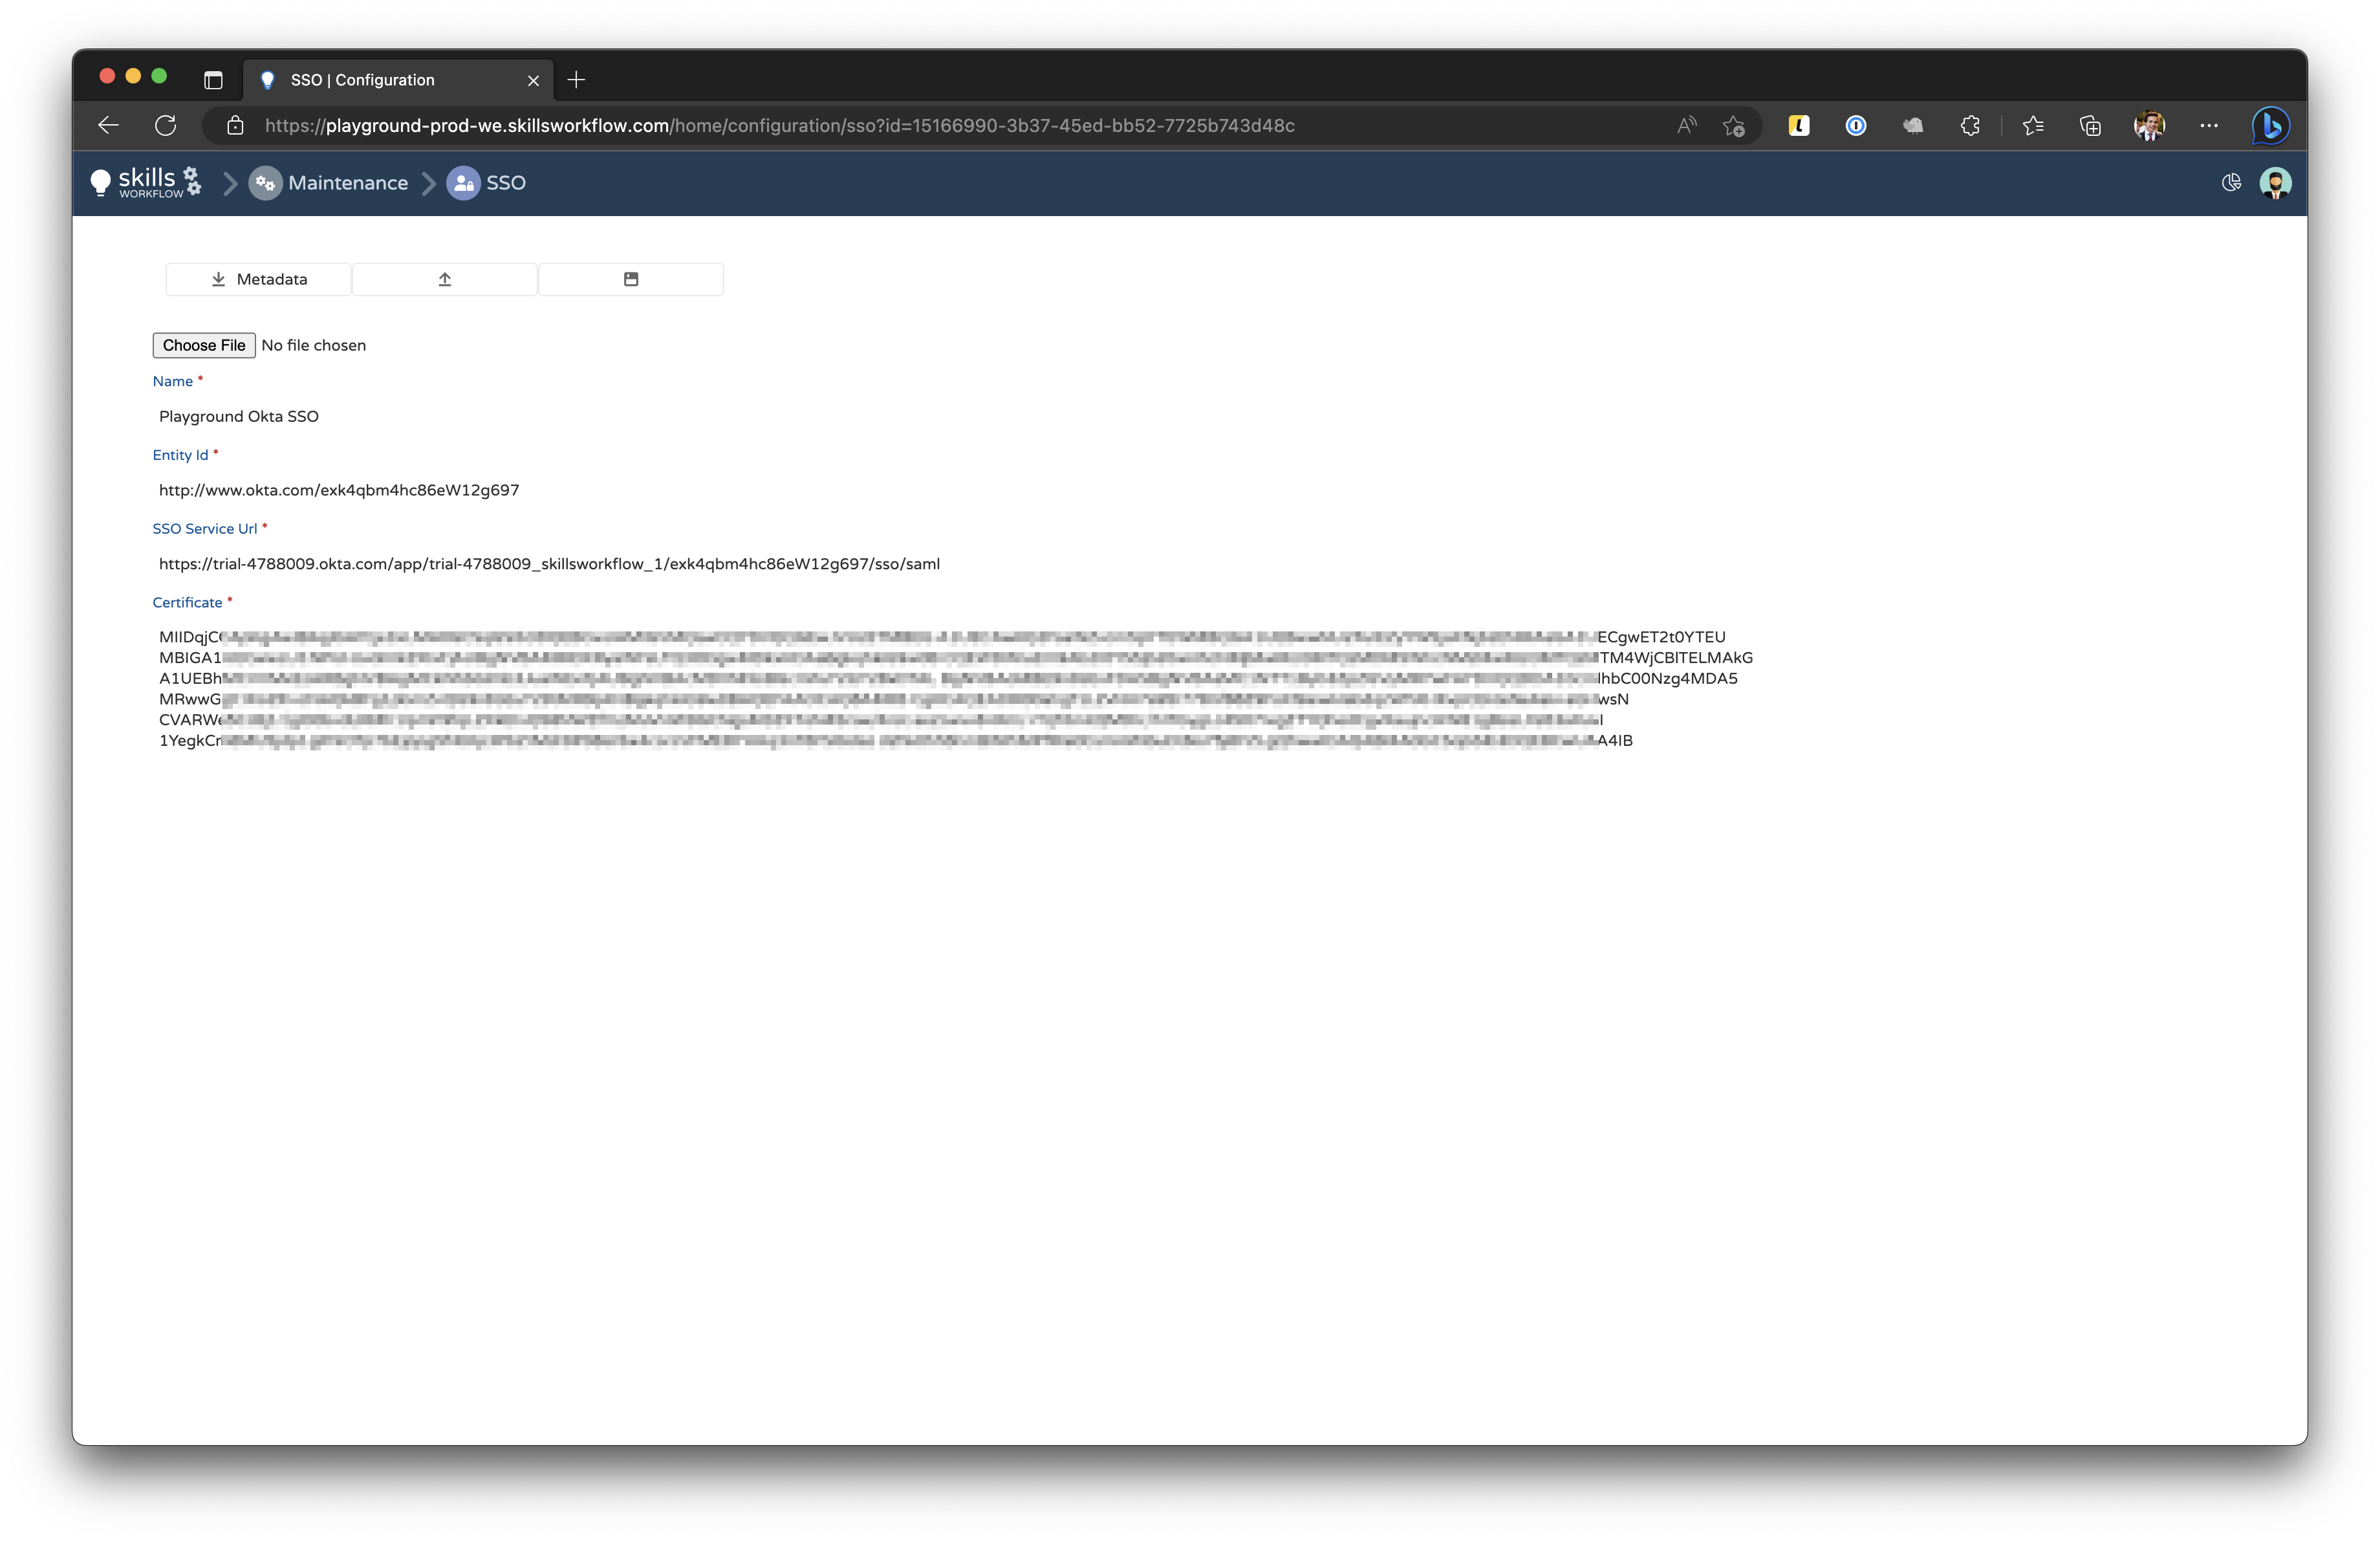
- Okta Identity Provider Single Sign-On URL to the system
Improving user experience
To provide a better user experience while using OKTA and Skills Workflow integration, it is recommended to:
- Not displaying the SSO app to the users
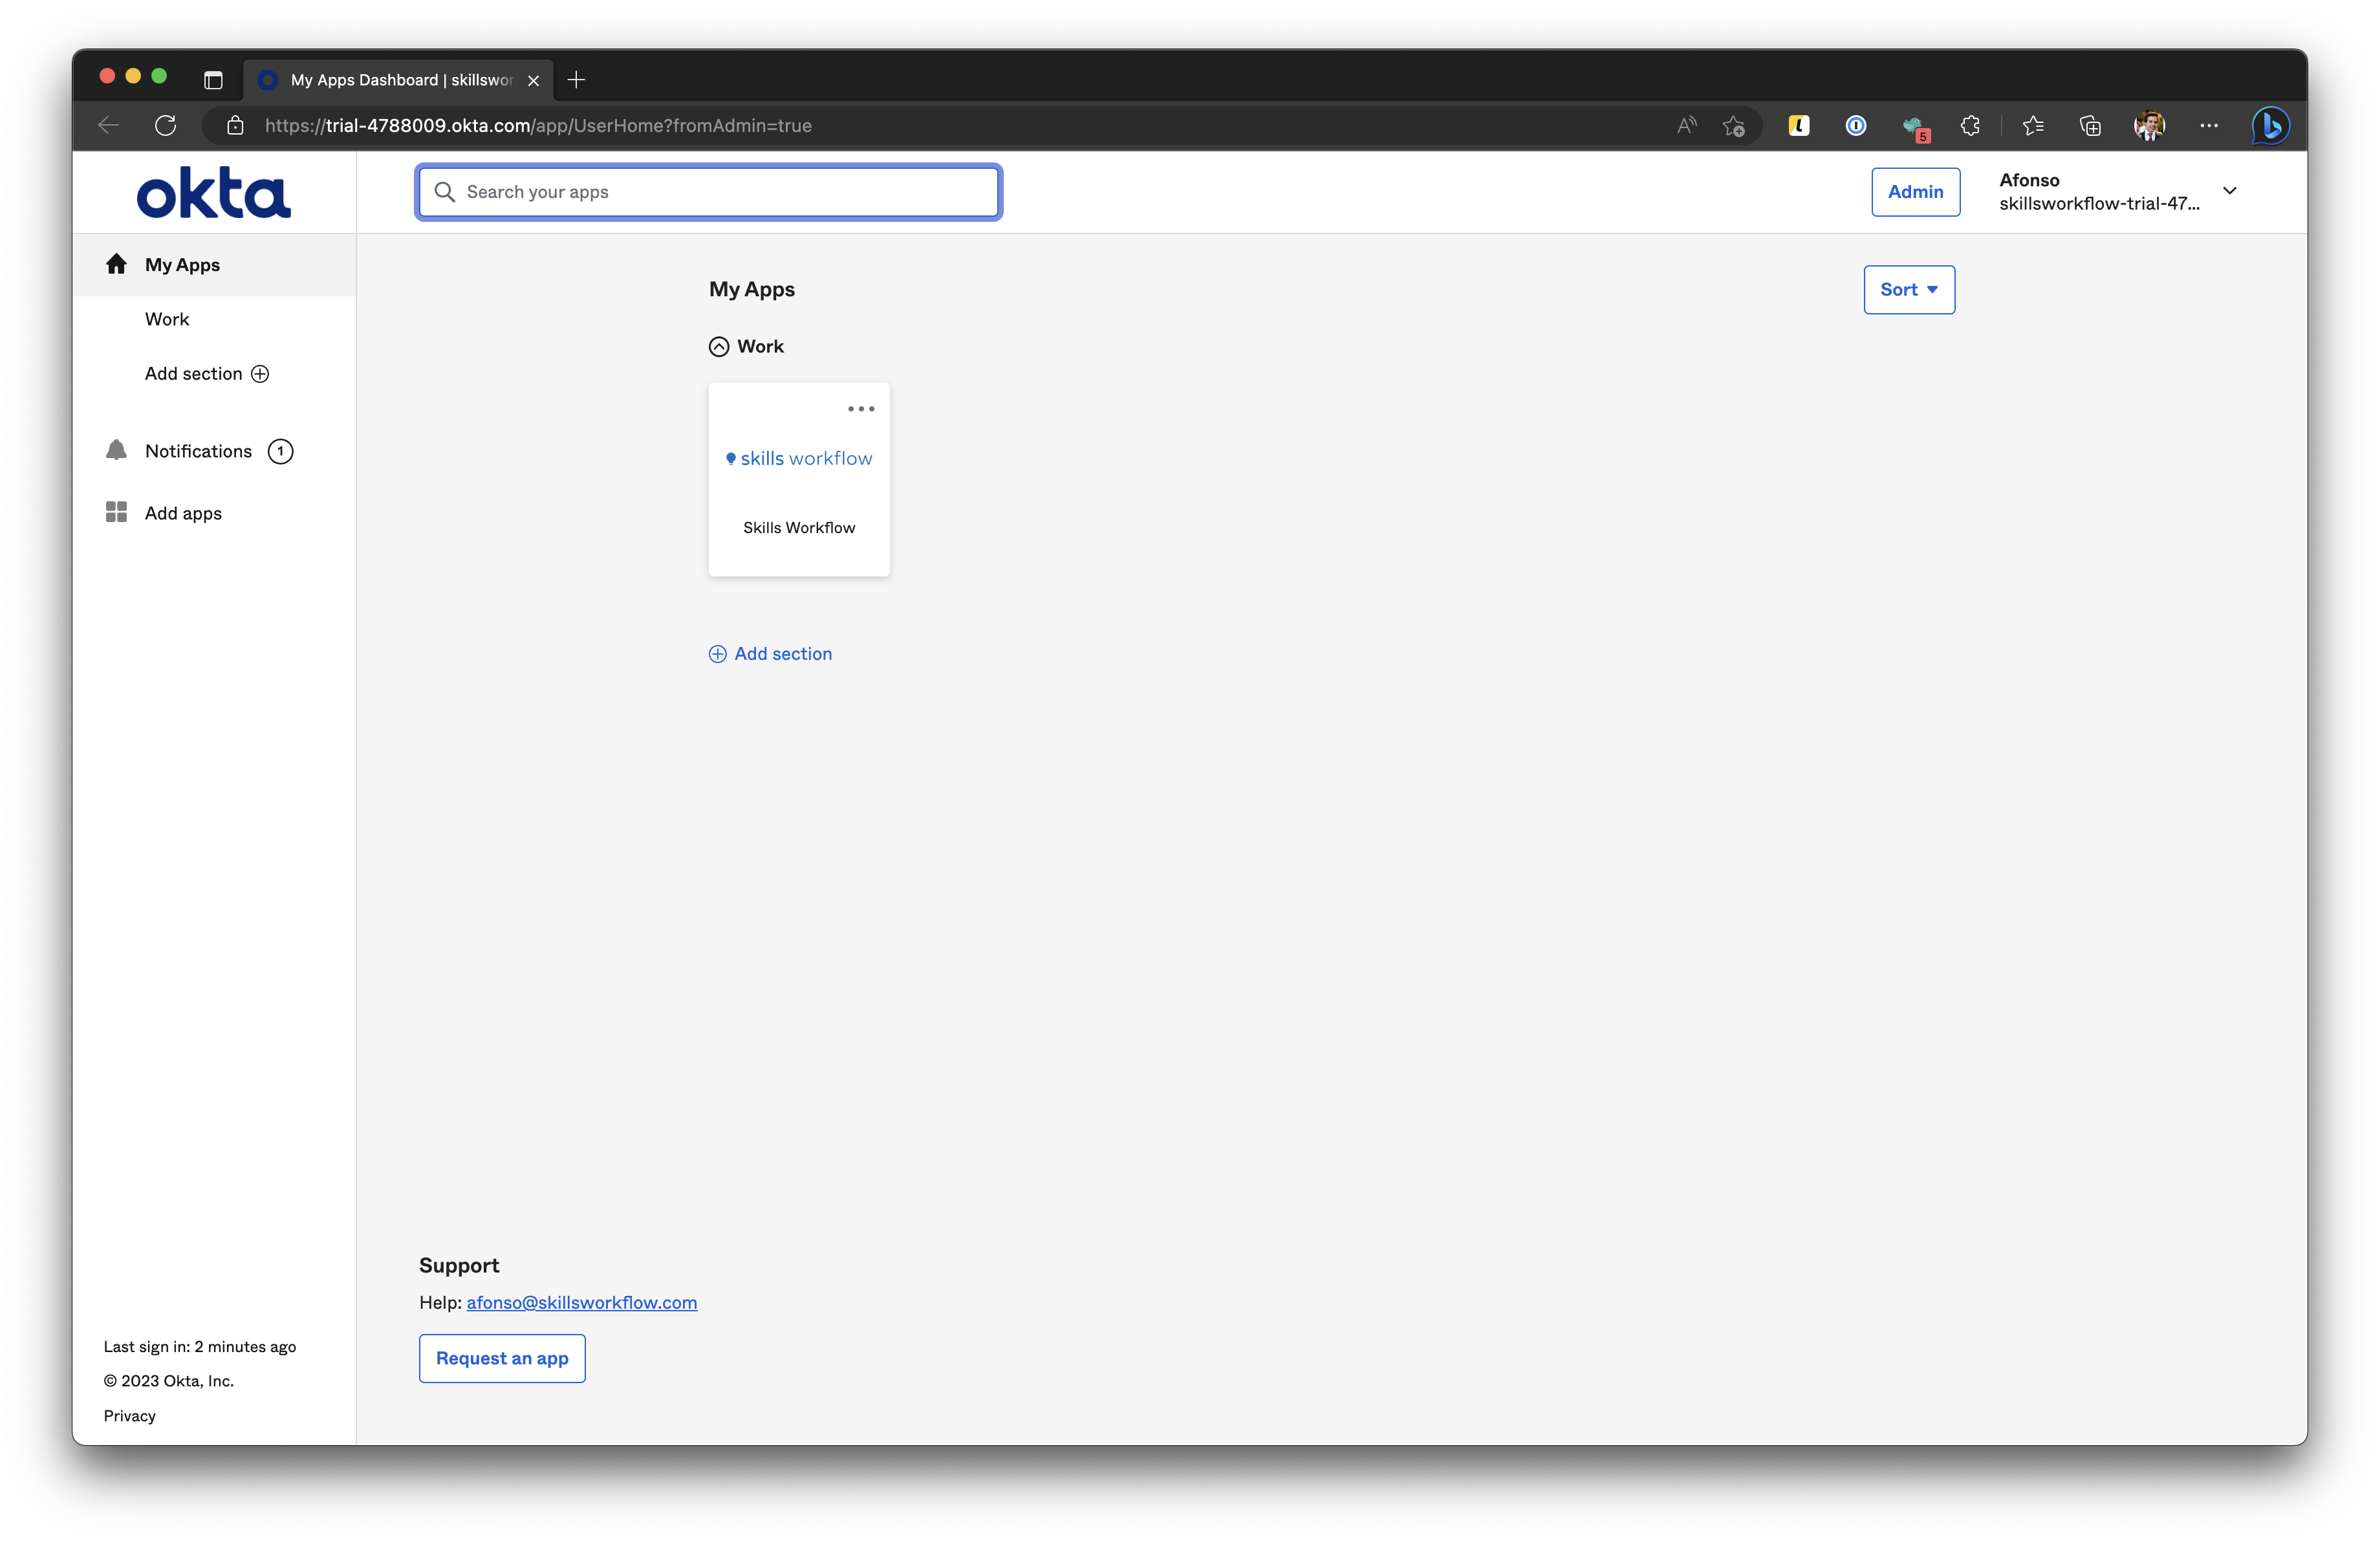
- But create a Bookmark App within OKTA that will provide the full SSO user experience
Please proceed with the following steps:
-
On the General tab, set the application visibility as not visible to the users
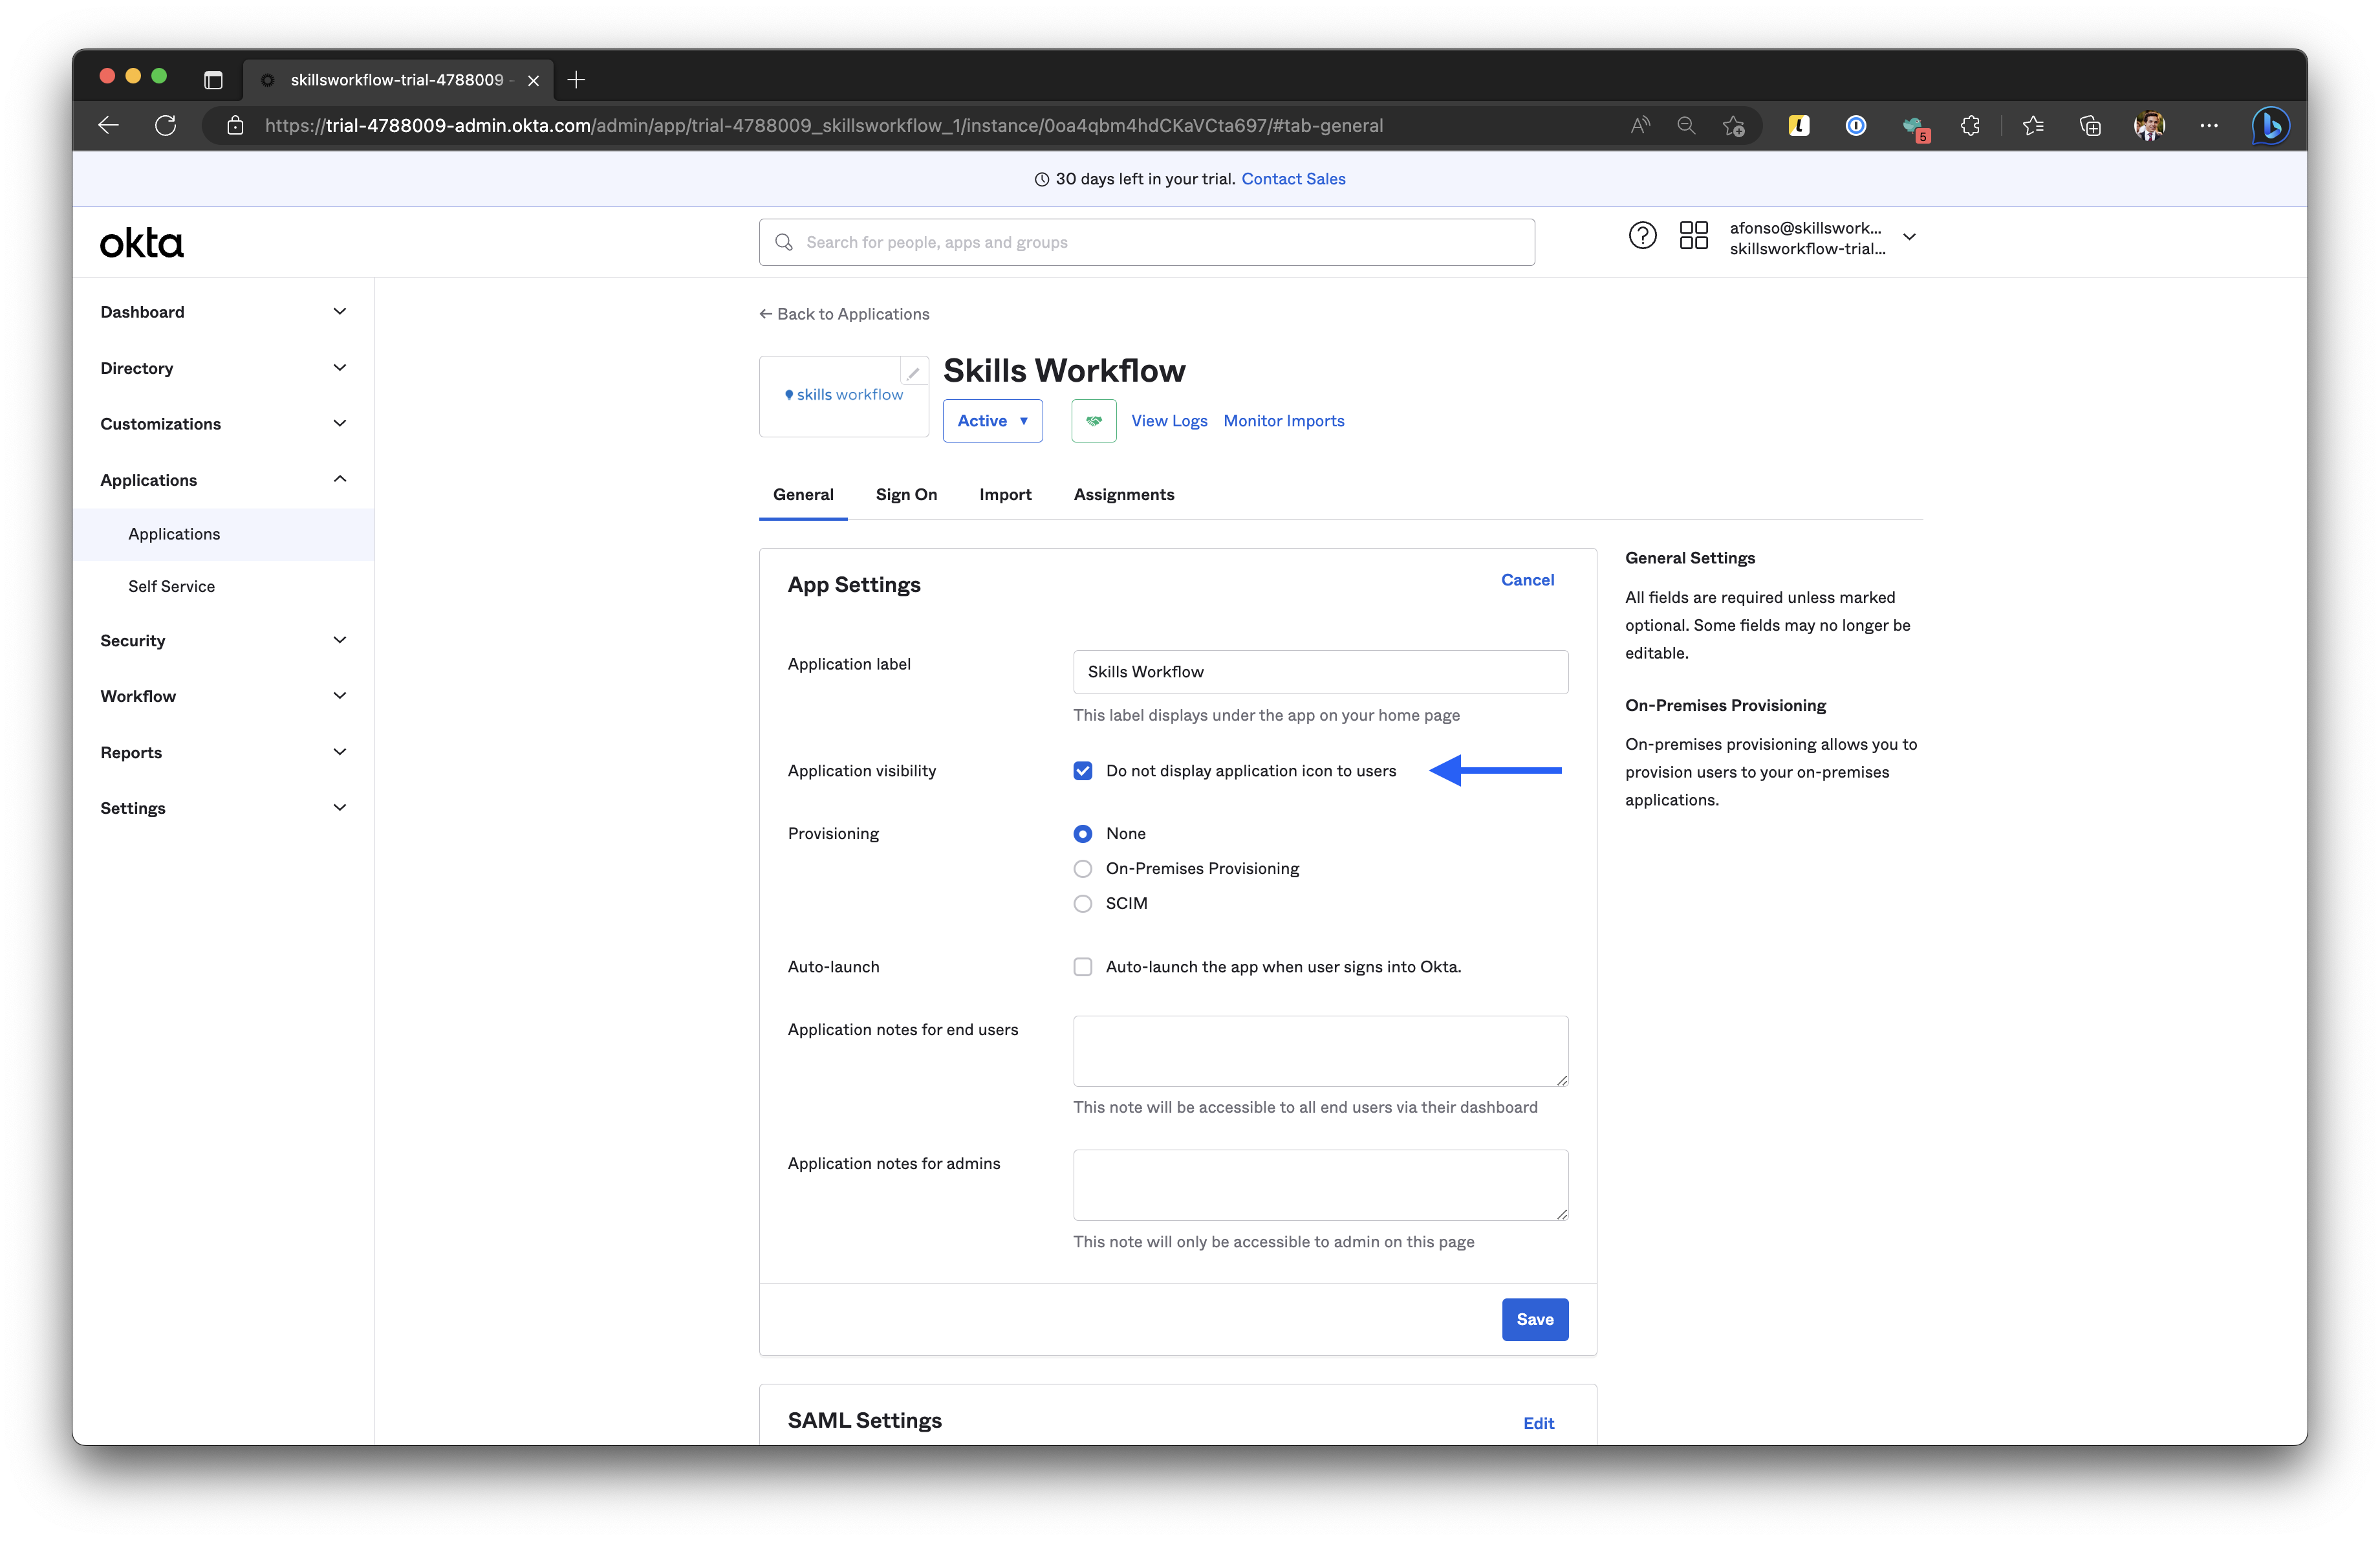
-
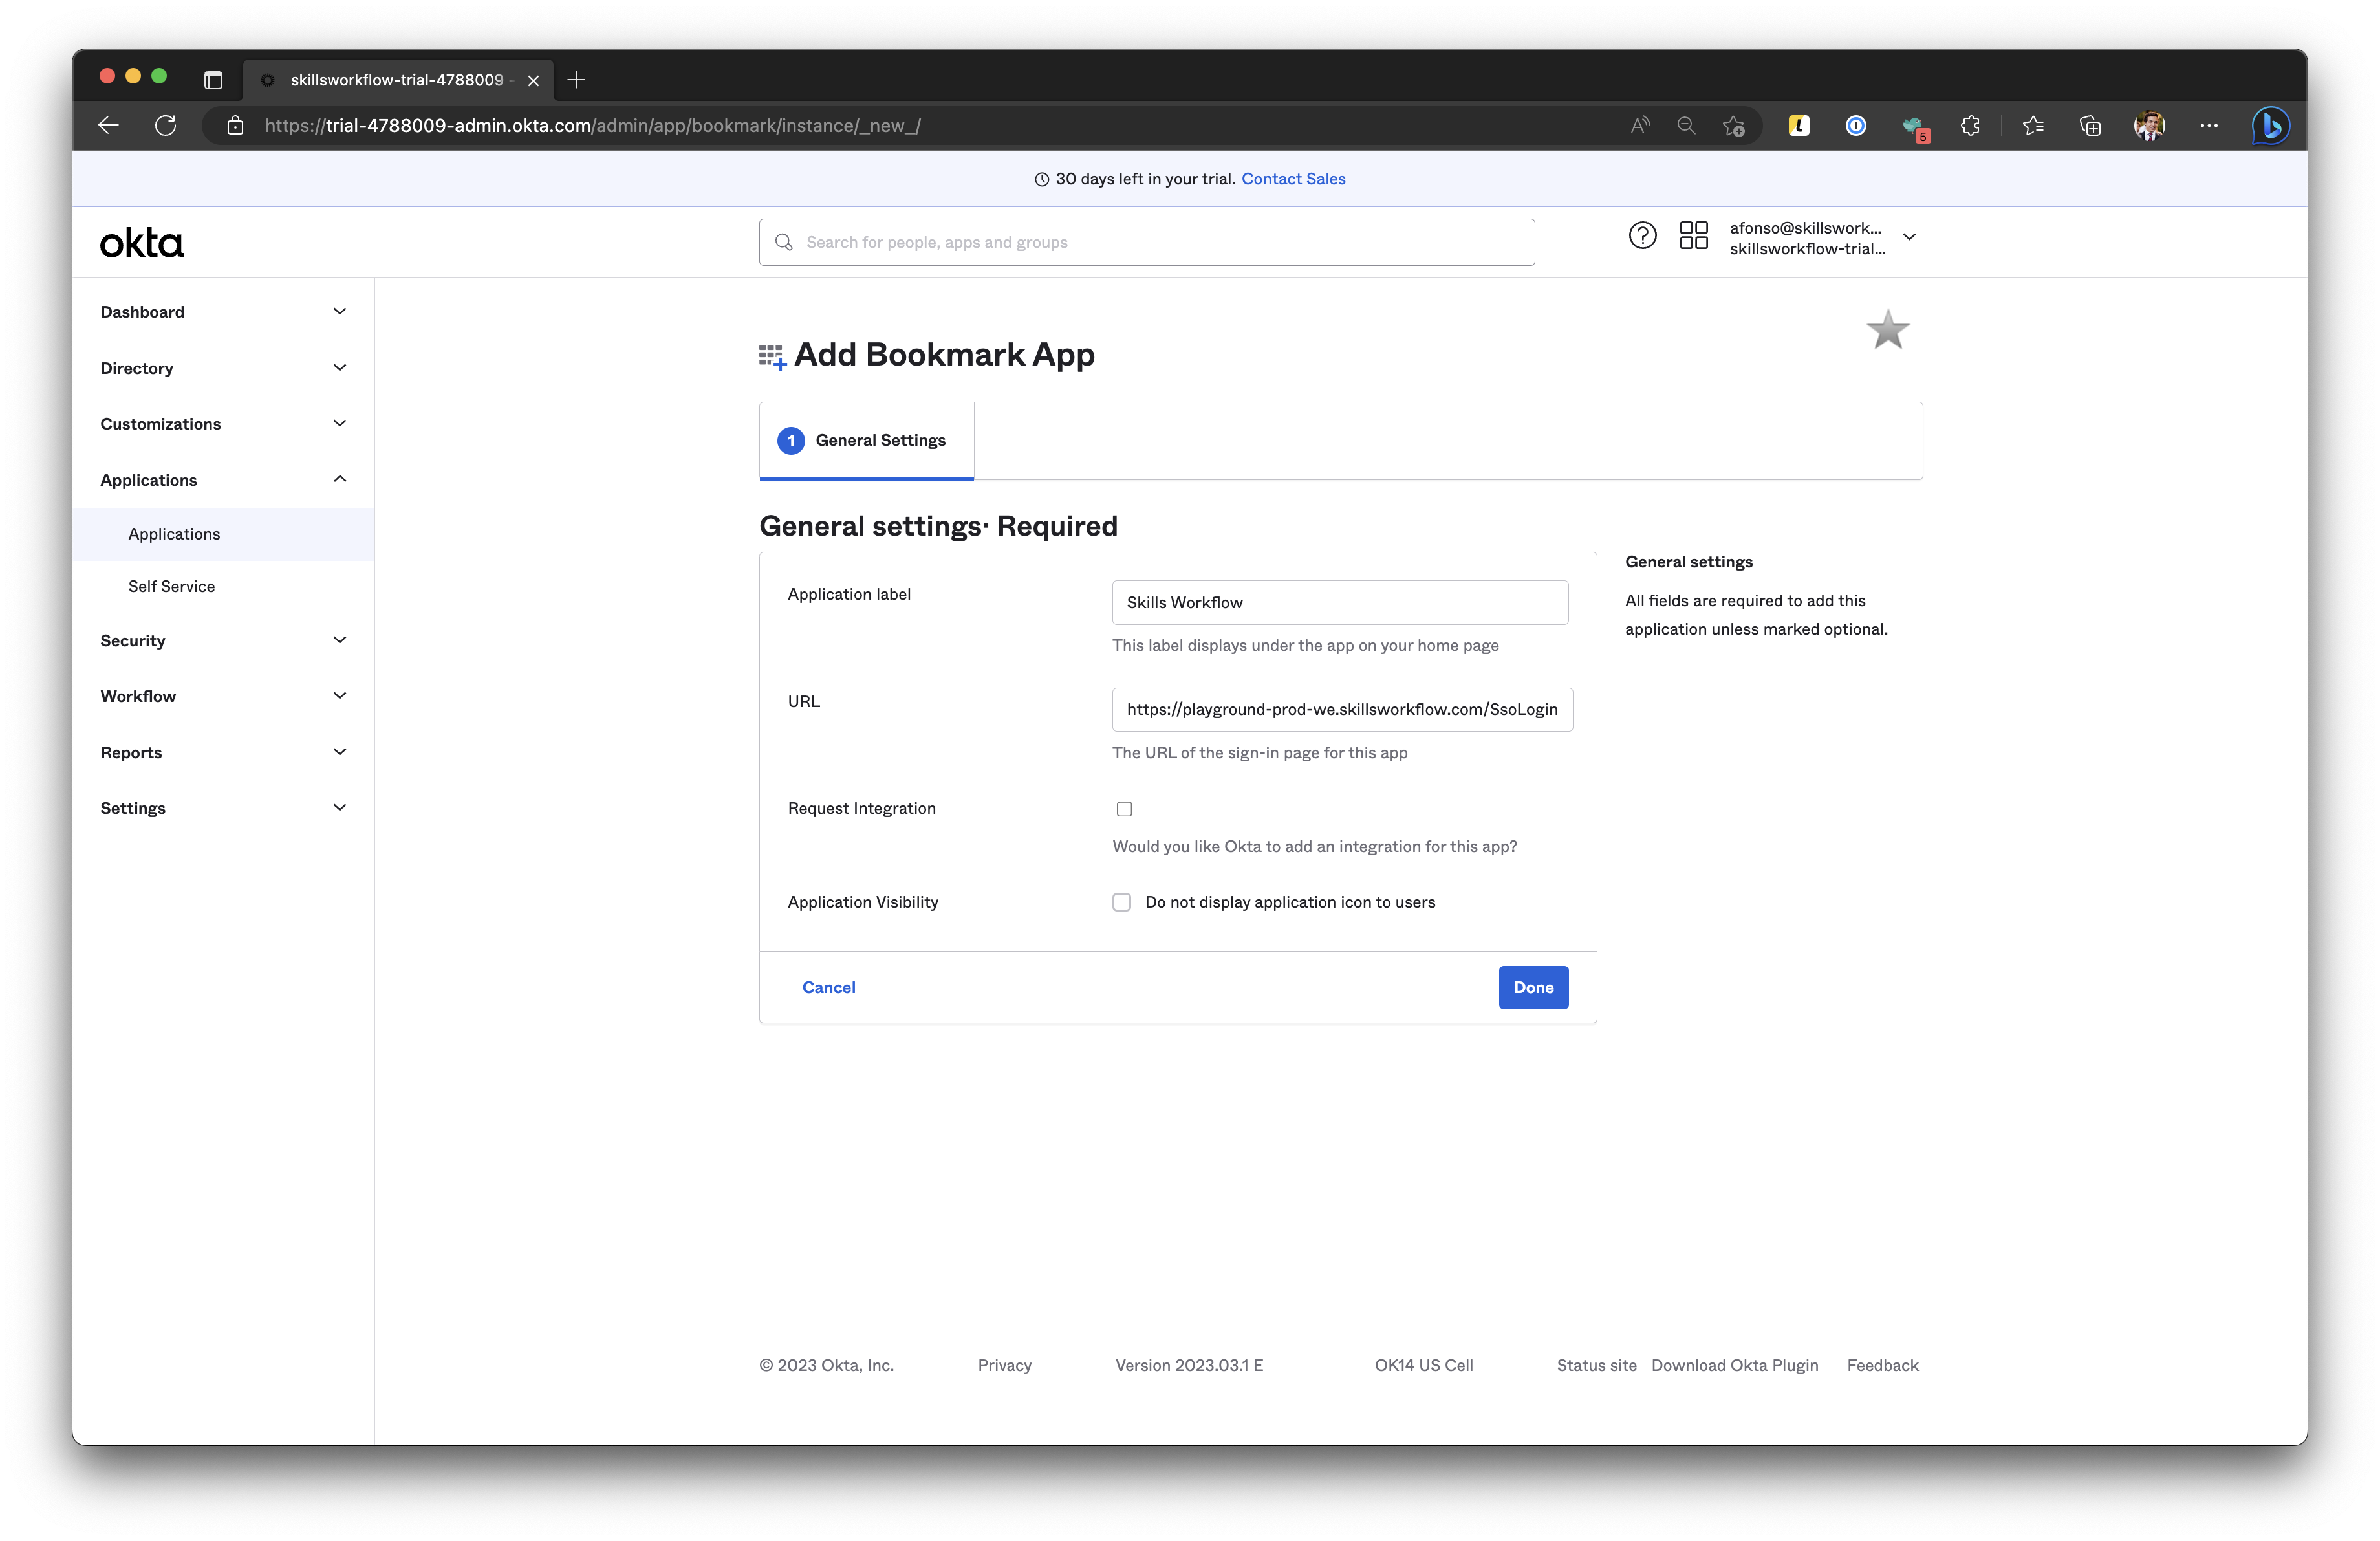
Go to Applications, and create a Bookmark App.
- Set the Application Name as Skills Workflow
- Set the URL with the Tenant URL followed by /SSOLogin
- And assign the users to this new Bookmark App
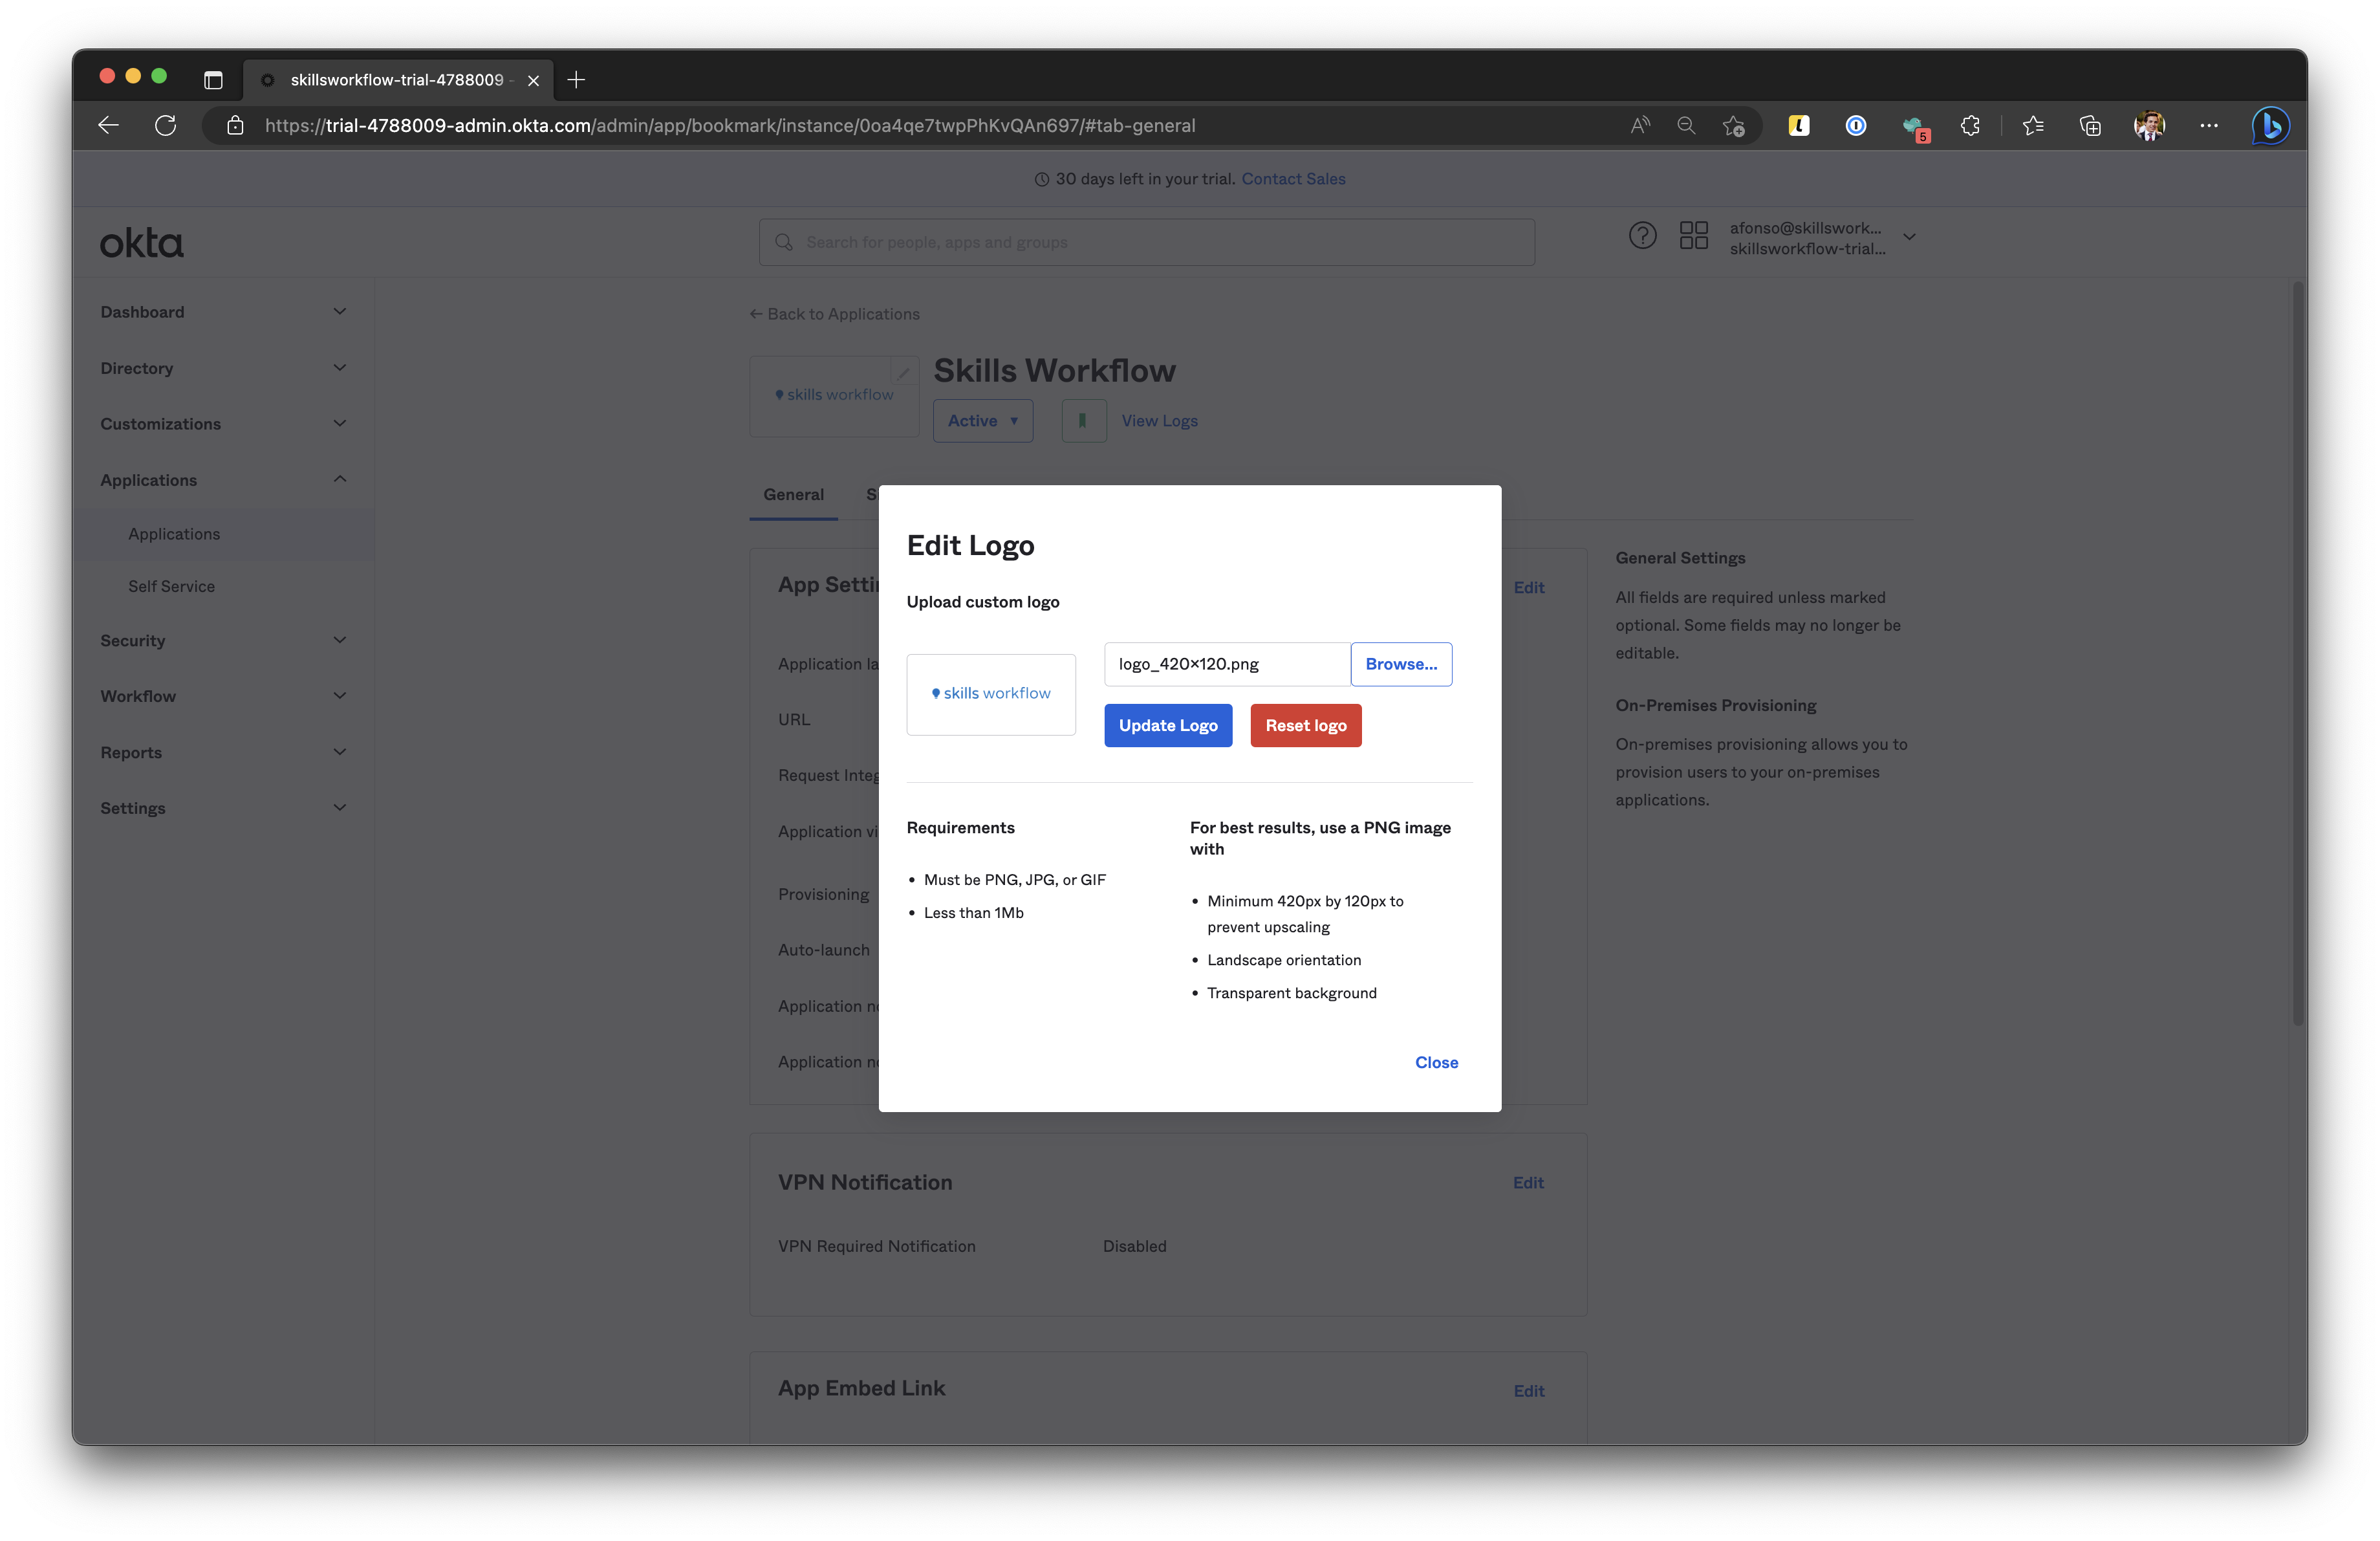
- Once it is created, go back to Bookmark App settings and under General tab, add a Logo to the Bookmark App
